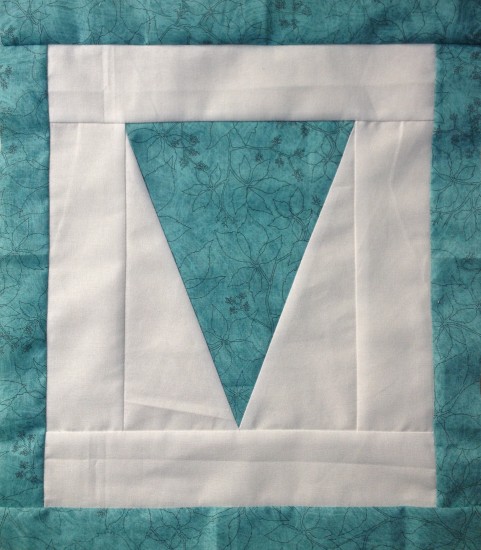
The first Friday of each month I will be sharing five patterns for five letters! You can find all the other posts for each letter’s pattern here. Read through the pattern thoroughly, use a 1/4″ seam and press all seams open unless otherwise stated. This is one of the trickiest letters – just take it slow, pin carefully and if you lose some points here or there, don’t stress – it’s just your own handwriting 😉
What you will need
Print:
1 – 6.5″ x 8.5″
4 – 1.5″ x 12.5″
Background:
2 – at least 5.5″ x 9.5″
2 – 2.5″ x 8.5″
2 – 2.5″ x 10.5″
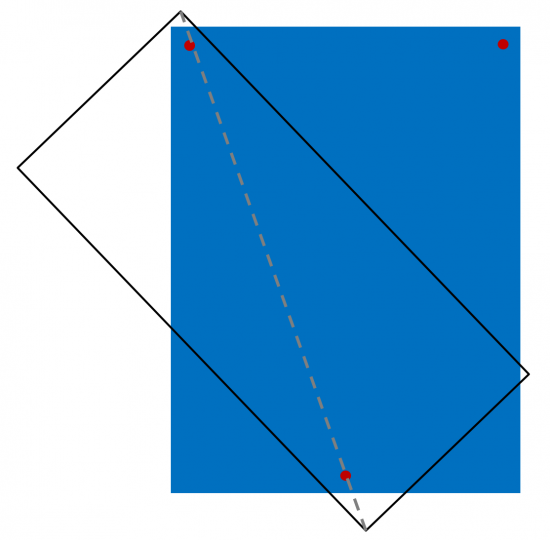
1. Using a washable fabric pen (I use Sewline), make 3 small marks on the right side of your large print rectangle – two at the top of the rectangle at 1/4″ from the top and side edges; one at the bottom of the rectangle 1/4″ from the bottom edge and 3 1/4″ from the edges. These marks help align your background fabric so as to retain the correct seam allowances.
2. Draw a line across the back of one large background rectangle from the top right corner to the bottom left corner, as shown above. Align the rectangles right sides together so the line connects the two marks (top left and bottom mark). You will want at least 1/4″ of the background rectangle above the print rectangle to allow for seam allowance, and plenty of overhang at the bottom. Double check that when you fold the background rectangle back on the line to reveal the right side of the fabric that it covers all of the print rectangle below. Pin carefully then sew along the line. Trim 1/4″ from the line towards the bottom left corner and press towards the background.
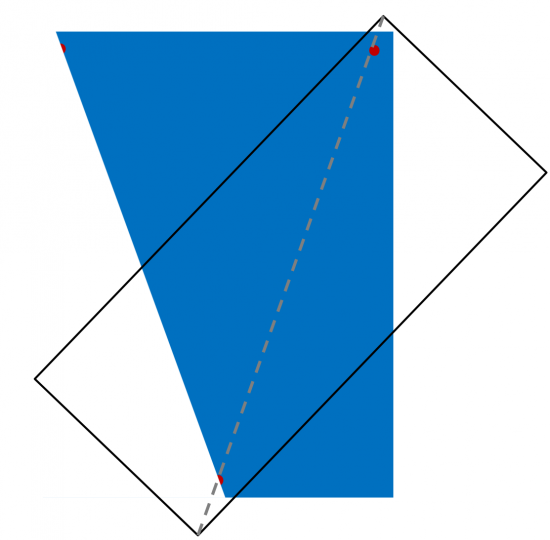
3. Repeat for the remaining large background rectangle, except this time draw the line from the top left corner to the bottom right corner. Align, pin, sew, trim. Press towards the background fabric.
4. Trim the unit to 6.5″ x 8.5″, maintaining the 1/4″ seam allowance marks and ensuring that bottom point is 3 1/4″ from each edge. With this technique, it is easy to lose a few millimetres. Don’t stress, just slightly reduce the seam allowance in the next step (1/4″ for the background fabric strips and a scant 1/4″ for the V unit).
5. Sew the 2.5″ x 8.5″ strips of background fabric to the sides of the letter, followed by the 2.5″ x 10.5″ strips to the top and bottom of the letter. Trim to 10.5″ x 12.5″.
6. Sew the 1.5″ x 12.5″ strips of print to the sides of the letter, followed by the top and bottom of the letter. Trim to 12.5″ x 14.5″ and press.
If you make something from this pattern, please feel free to share it in the Flickr group or tag it #easyasabcqal on Instagram. And don’t forget to come back and link up this month’s blocks and be in the running for some great prizes!


Leave a Reply