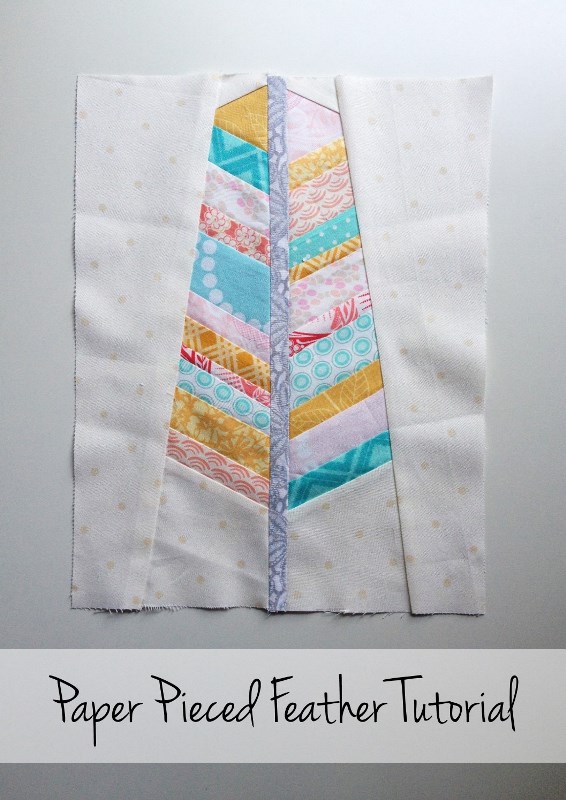
Last week, I shared the feather quilt blocks I made for Gina, including this paper pieced feather block. I wanted to share the pattern with you, as it’s a great beginner-friendly paper piecing pattern and a great scrap buster! And while I’m at it, a full paper piecing tutorial to show you just how easy it is.
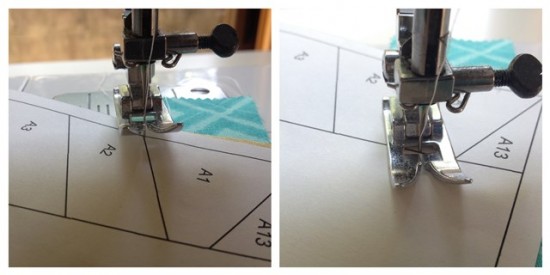
For those who have never tried paper piecing, it’s really not that scary. In fact, it’s potentially even easier than normal piecing because you have a line to sew along on the paper template! Just remember to turn your stitch down low – I normally piece at about 2.7 and I paper piece at 1.2. This is to make sure that it’s easy to tear away the paper at the end without tearing out stitches! Let’s do this together…
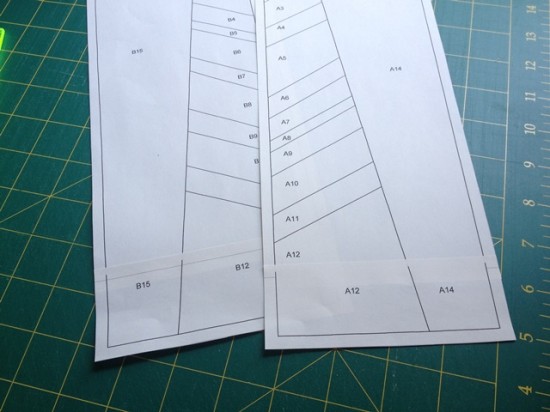
1. Download the pattern and print at actual size. Cut out the 2 templates and glue the ends on. The templates should measure 12.5″ long.
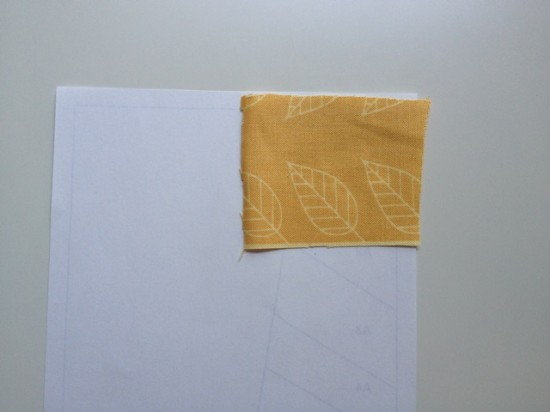
2. Place your first piece of fabric wrong-side down on the back of the template. I use a small dab of Sewline glue to hold it in place, but any washable glue stick will work just as well. You can also use a pin, but be aware that it will bend the paper which can make it a bit harder to sew accurately.
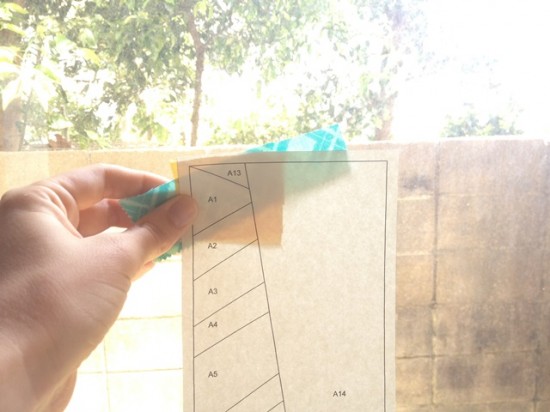
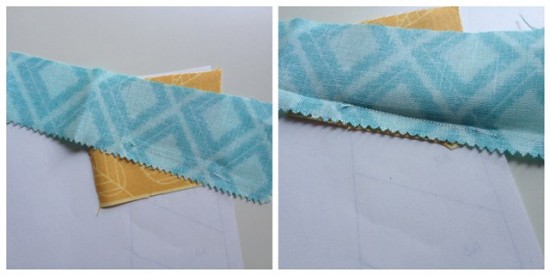
3. Place your second piece of fabric right-sides together with the first piece. Hold the paper up to the light and make sure that both pieces overlap into the A2 segment on the paper by at least 1/4″. You might like to pin the fabric together; I personally just hold tight and move slowly.
You also need to ensure that your second piece of fabric will cover the whole A2 segment with a 1/4″ seam allowance around each edge once it’s sewn and pressed back into place. The best tip I ever learned was to imagine that the segment and fabric are a butterfly – symmetrical along the centre/the line you sew along. This is especially important when sewing a pattern like this where there are non-square angles. There’s nothing worse than sewing a piece on and pressing it in place to discover that it doesn’t cover your pattern! Have you ever tried to unpick tiny 1.2 stitches?! Not nice! For this pattern, you want the fabric to hanging over the edge of the paper more so than the other end of the segment.
4. Place your fabric and paper pattern under the needle with the front of the paper facing up. Place the needle down at the start of the line. Backstitch a couple of stitches into the seam allowance, then sew along the line until you reach the end and backstitch again. It is really important to backstitch when paper piecing to keep the stitches in place when you rip the paper off at the end.
5. Trim the seam to 1/4″ and press the second piece of fabric into place. You can use your finger, or even an iron, but as a good compromise, I use my Clover finger presser – the ease of finger pressing but a much flatter seam. Then line up the third piece of fabric.
Repeat steps 3-5 until you get to A14.
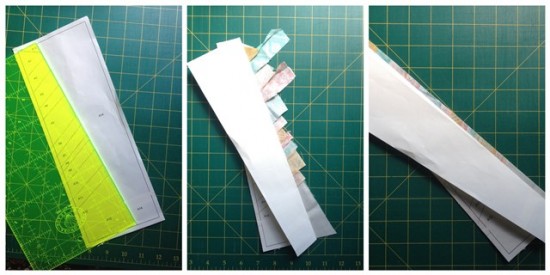
6. Fold the paper back along the A14 seam line. I use a ruler to help guide it. Align your ruler a 1/4″ away from the folded paper and trim the excess fabric off from the feather. Then align your background piece with the seam line and sew the seam as normal.
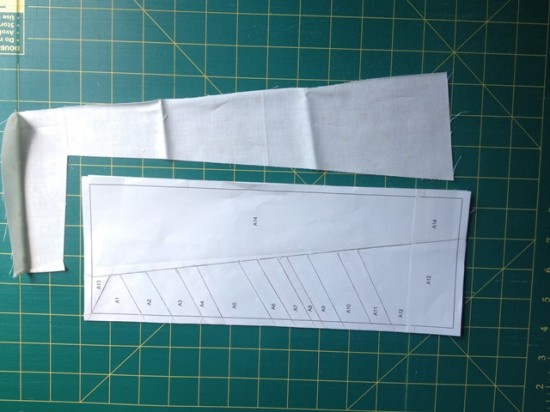
7. Trim the excess off all around your block so that all fabric is aligned with the edge of the paper template.
Repeat steps 2-7 for the B template, adding the feather stem too.
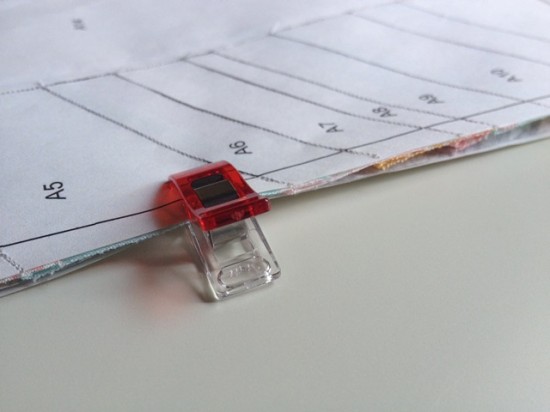
8. Place both A and B templates right sides together, aligning the feather edge on A with the stem on B and sew the seam as normal. When sewing the templates together, especially for long seams like this one, I feel a lot safer from the risk of the templates shifting if I use clips to hold them together. Again, you can use pins, but they will distort the paper. I have previously used bulldog clips, but now use Clover Wonder Clips.
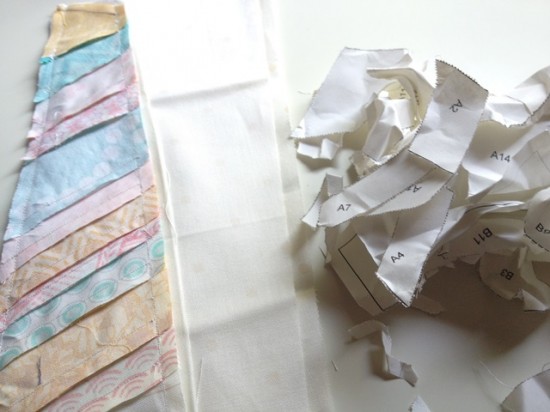
9. Riiiiiip all that paper off! Give it a good press with an iron and enjoy!
I hope that helps you tackle your first paper piecing pattern. If you have any questions, leave me a comment and I will help you however I can!
Post contains some affiliate links. You don’t pay any extra, but I receive a small commission for any purchases made. I do not recommend anything I don’t already know and love, all opinions are 100% my own.
Samantha says
Thank you for this pattern, it’s very kind of you. 🙂
I have a free pattern on Craftsy, what’s this affiliate links that you mention? I don’t want to be making money for dodgy sites!
Deanna says
I was looking for a pattern for a feather and found your site. Thanks for the paper piecing pattern. I will give it a try and see what happens! Love the feather designs!
Paula@TheSassyQuilter says
Love this block! Thanks:)
michelle says
Thank you for this pattern, I am new to foundation piecing and am hoping to make this into a book mark for my mum.
Susan says
Thank you for this tutorial. I love feather blocks and your instructions make it look doable.
Linda says
Thanks for this lovely pattern. I love leaves and this will work very nicely. However did I miss something. Is piece #A13 done first or last after piece A 12. I am confused on this part.
Linda says
Thanks for this lovely pattern. Wondered do we sew the B13 and A13 on before the B14 and A14 and after all of the other pieces are sew on? Looks that way to me but wanted to make sure before I start this project. Thanks
Alyce says
Hi Linda,
You piece in numerical order, so yes, 13s go on before 14s.
Celia Yancey says
Thank you so much for sharing this free pattern. I have never done paper piecing and am looking forward to learning. Also, my grandson has a feather theme going in his room and this would make a perfect quilt block. Thanks again!
Lynda Ballard says
I am excited to try this pattern. Your tutorial looks easy to follow. Thanks for the simple instructions and the pattern.
Alyce says
Thank you! Good luck – let me know how you go!
Maria Angeles says
Hola… Tiene el patrón de las Japonesas? Estoy viendo su blog por primera vez y no entiendo bien como funciona. Tiene cosas preciosas. Gracias
Ann says
How did you use this block?
Alyce says
I sent it to a friend as part of a quilt block exchange.
Rebecca Schmidt says
Can you show more pictures or be more specific on joining the two pieces together? I absolutely love this pattern! Thank you!
Alyce says
You can find a full tutorial here: https://www.blossomheartquilts.com/2016/12/foundation-paper-piecing-tutorial/
Carol says
Thank you so much for the pattern and tutorial. I am new to paper piecing and found it really useful.