Hello!! I’m Diane and I sometimes blog over at from blank pages… (because I’ll be honest, there are too many things to do in a day, and sadly blogging doesn’t make it on the list near enough!) 😉 You can find me regularly on Instagram! I’m @fromblankpages. I’m super excited to share my block with you today! I LOVE the concept of creating a design, that when is repeated, creates something different and unexpected! As Alyce puts it, “an interesting secondary design.”
I love to paper piece and have created a pattern that I hope you will enjoy! The pattern includes specific instructions for assembling the block, so I won’t go over that here. If you do have questions about the pattern itself, feel free to email me. I’m happy to help! What I want to share with you are some different designs you can create with this block based on your fabric and color placement! The pattern also includes coloring pages, so don’t feel limited to what you see here. I hope you’ll play with the design and experiment until you come up with something you love!
First I will show you a single block, and then I will share some repeat options (all repeats shown here will be 4 blocks by 4 blocks). I based my block off of this mock-up:
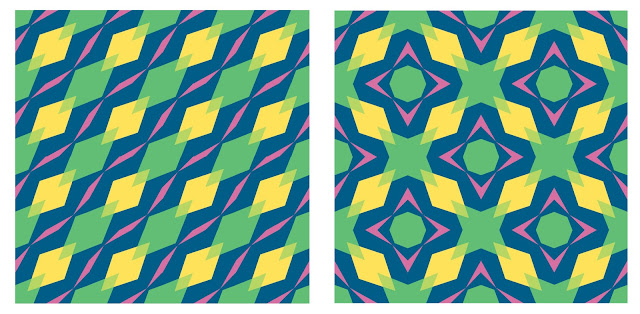
Here are two different repeat options.
For the first option above, you can change the block just a little bit to create a more solid design.
If you alternate between two opposite blocks:
Your repeat designs change just a little bit.
Or how about a rainbow quilt?! The small overlapping diamonds are a fun place for color blending.
Or you could change up your color placement and come up with something even more different.
If you’re a little unsure where to place the colors, I recommend starting with a grey scale version! This will help you know what will work and what won’t with value (lightness and darkness) and color placement. If the design disappears, place more contrasting colors or values next to each other!
So many possibilities from a very simple block. I love designs that push you to think outside the box! I hope you’ll have fun with this one! I can’t wait to see what you make!!
A NOTE ABOUT THE PATTERN:
Because the pattern finishes at 12 inches square (12.5 inches unfinished), there are two pattern templates that don’t fit on 8.5″x11″ paper. But don’t worry! There are two options for working around that. I created the pattern in two different page sizes. 1. Letter size is your normal 8.5″x11″ paper. You will need to tape the two pattern templates together before piecing, but that’s easy to do. OR 2. Legal size paper is 8.5″x14″ and at least in the US, you can purchase this size paper almost anywhere paper is sold (like Walmart or office supply stores). This size paper should work in any printer since it is the same width. Just make sure you adjust the paper size in your settings before printing. If you use this size you won’t need to tape anything together. Simply cut out our patterns and you’ll be ready to go! Both are available in my Craftsy store!
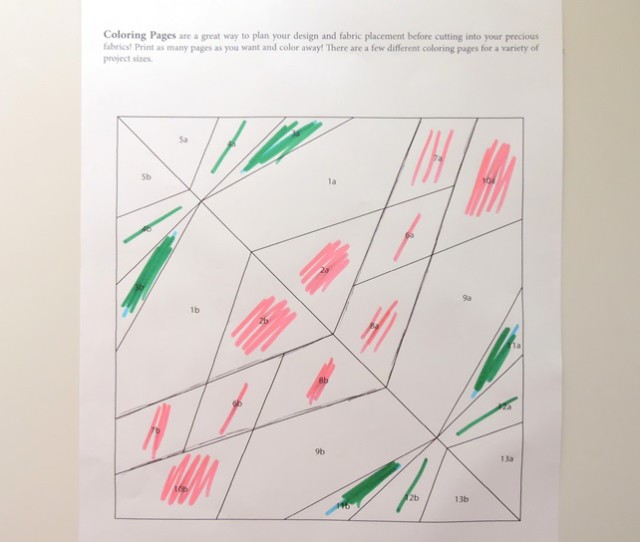
And if you are anxious to start playing with this, here are some of the coloring pages that are included in the pattern!
Alyce’s Take
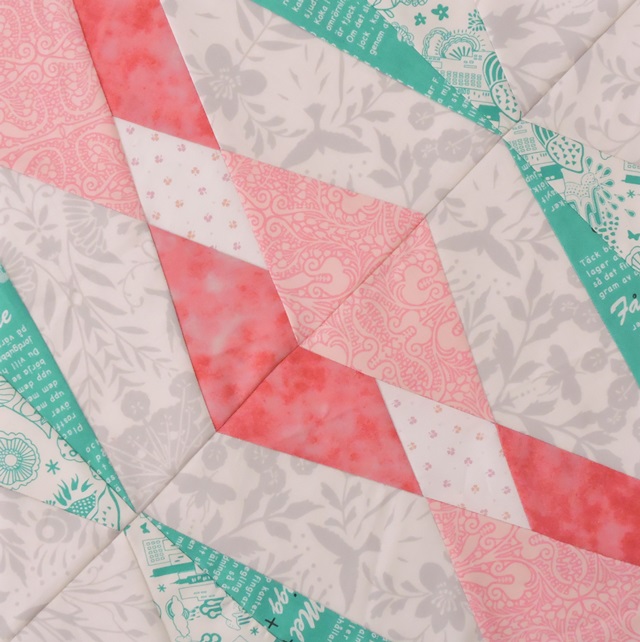
As you can see by my block, the fabric placement options are truly endless, what with all of Diane’s options too!
Here’s what I originally coloured, although when I went and cut my fabric, I swapped my medium and darkest pinks by mistake, so they got swapped around. But that’s ok, I love the result still!
My biggest tip for this block is that the long diagonal seam (plus all the other pieces that will be a mix of bias edge directions as is the norm in paper piecing) can lead to your block looking a little diamond-shaped at the end. Just be very gentle when pressing your block as you go, and at the end. Especially if you’re sewing this block as a part of a quilting bee! Let your queen bee be the one to decide if to trim, or just to gently iron or pull into shape when sewing.
Rita from Fabric Please is offering 25% off everything in store with the code beehive! Simply shop to your heart’s content and enter the code at check out. She has flat rate shipping, and you can use the code as often as you like!
You can find all the block tutorials on the original The Bee Hive post. If you’re sharing your blocks or quilts from The Bee Hive on social media, be sure to use #thebeehivequilts and @blossomheartquilts and @fromblankpages so we can find your awesome work!
If you are in a swarm for The Bee Hive, please see the quilting bee etiquette post for answers to any questions you may have. If it’s Hidden Gems-specific regarding the block construction, please ask in the comments on this post and I will answer it here so that everyone can benefit from the question/answer.


Hayley says
Oooh! I love this one. My month for the bee is December and I thought it would be the best because I would have so many choices for my block but I think it will be super hard to choose.
Tiffany says
Wow. This is incredible.
Sarah Goer says
This block is brilliant. And I really love that there are so many variations shown. Thank you!