When I agreed to help sew and blog along with the Farmer’s Wife 1930 Quilt Along, aka The Project That Shall Not Be Named ahem, one of the bonus perks that came out of it was receiving the From Marti Michell templates that would help make the blocks. So when Angie suggested the Marti Michell Mini Quilt Mania, of course I had to jump on board! The aim of this blog hop is not only to share 13 tutorials for mini quilts, but if you own these templates because of the quilt along, you’ve got a great place to start in using them for other projects too. Plus, if you make something by November 18, there’s something fun happening then too! There’s a fantastic line up, and some incredible tutorials already shared:
12/08/2016 Angie @ GnomeAngel.com
19/08/2016 Tonya @ The Crafty Mummy
26/08/2016 Lucy @ Charm About You
02/09/2016 Kirsty @ Bonjour Quilts
09/09/2016 Cat @ Cat + Vee
16/09/2016 Nathalie @ Les Ouvrages de Nat
23/09/2016 Alyce @ Blossom Heart Quilts
30/09/2016 Peta @ She Quilts A Lot
07/10/2016 Lisa @ Sweet Little Pretties
14/10/2016 Rachel @ Wooden Spoon Quilts
21/10/2016 Raylee @ Sunflower Quilting
28/10/2016 Lisa @ In The Boon Docks
04/11/2016 Marti Michell
And that fun thing I mentioned? Not only do you get 13 amazing tutorials, but when you make your own mini quilt using the templates, you can enter it to win some fun prizes on November 18! Check out Angie’s blog post for the deets on that. So, what do I offer you today?!
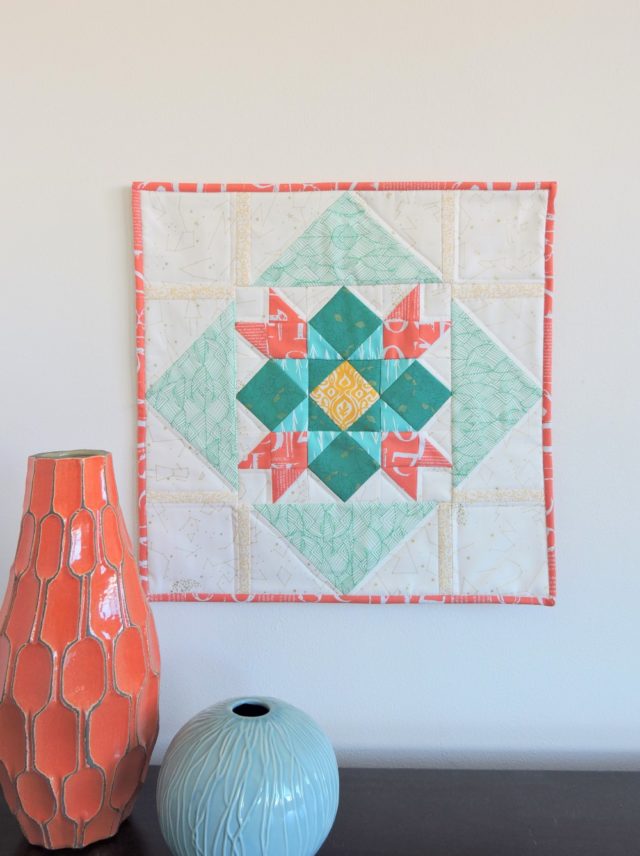
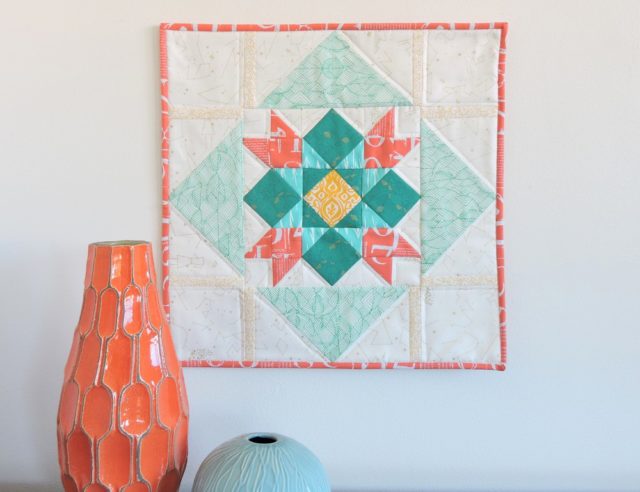
Nebula uses both Set A and B templates, with a couple of rotary cut strips too. Finishing at 17″ square, I’ve actually made it as a cushion cover by finishing it off with an envelope closure, because that’s my favourite size to use with an 18″ insert – makes for a nice and plump pillow! But it also looks beautiful on the wall too 😉
Nebula
You will need:
From Marti Michell Perfect Patchwork Templates Set A
From Marti Michell Perfect Patchwork Templates Set B
Fabric requirements
These measurements are approximate – with the smaller pieces, I suggest cutting the small shapes straight from your fat quarter/yardage/etc to reduce any fabric wastage.
Print 1 (mustard)
5″ x 5″ or charm square
Print 2 (dark teal)
1 fat eighth
Print 3 (aqua)
10″ x 10″ or layer cake square
Print 4 (coral)
1 fat eighth
Print 5 (light teal)
4 – 4.5″ x 8.5″
Print 6 (light mustard)
8 – 1″ x 4 1/2″ strips
Background
1 fat quarter
Batting
19″ x 19″
Backing (or pillow lining)
20″ x 20″
Pillow Backing
2 – 13″ x 17.5″ for an envelope closure pillow
Binding
2 – 2.5″ x width of fabric
Cutting
Using Template A3:
1 – Print 1
4 – Print 2
Using Template A5:
4 – Print 4
4 – Background
Using Template A6:
4 – Print 2
8 – Print 3
8 – Print 4
16 – Background
Using Template B8:
4 – Background
Using Template B9:
**4 – Print 5 (see Instructions before cutting)
8 – Background
Instructions
Block should measure 17.5” x 17.5”. Use a 1/4″ seam and press seams toward the darker print, or as directed.
Step 1. Sew one Print 3 A6 to Print 2 A3. Sew one Background A6 to the opposite side. Press seams toward A6.
Sew another Print 3 A6 and Background A6 to the other sides and press seams toward A6. Make 4.
Repeat for all Print 2 A6 and Print 1 A3.
Step 2. Pair a Print 4 A6 and a Background A6 right-sides together. Sew along the long sides to make a half-square triangle. Flip open the HST and press seams towards Print 4. Make 8.
Step 3. Sew a Background A5 to one HST from step two. Press seam toward A5. Make 4.
Step 4. Sew a Print 4 A5 to one HST from step two. Press seam toward A5. Make 4.
Step 5. Sew one unit from step three to a unit from step 4, nesting seams. Press seam open. Make 4.
Step 6. Arrange the units from step one and step five to create the star shape. Sew the units together to form rows, pressing seams in alternate directions. Sew the rows together and press seams open.
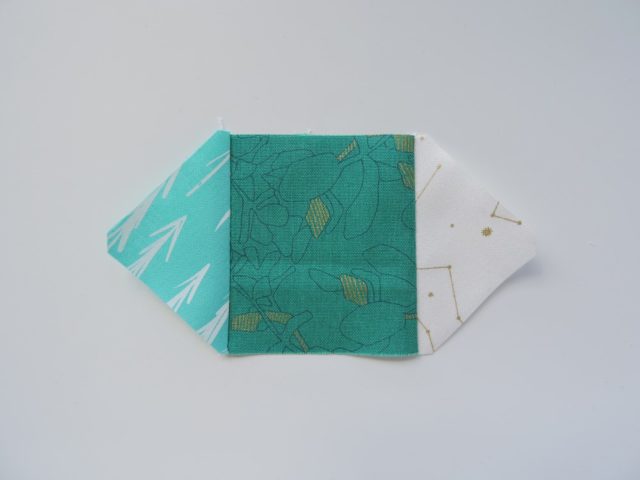
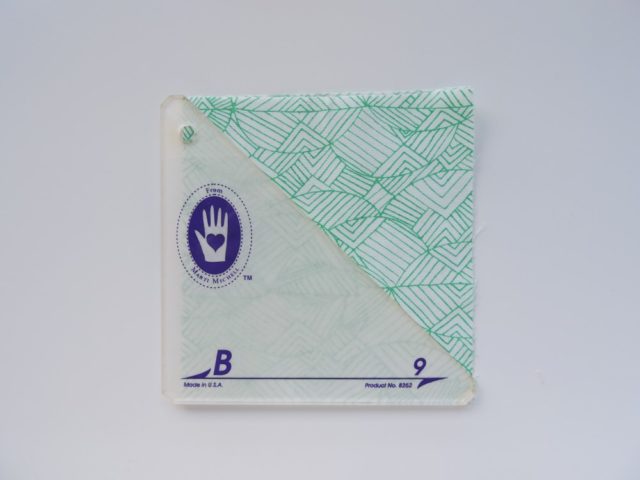
Step 7. Fold a Print 5 rectangle in half. Place Template B9 on top, aligning the bottom right corners together. There will be no fabric under the left edge! Trim around the template and press the fabric flat. Make 4.
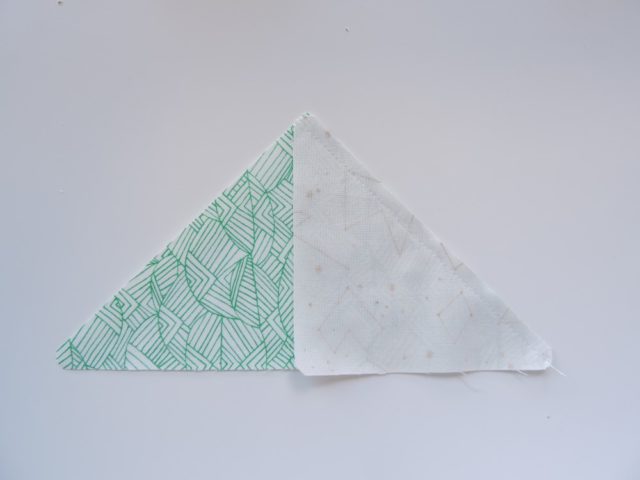
Step 8. Place one Background B9 right-sides together with the unit from step 7. Sew along the long edge, open the triangle and press toward B9. Repeat for the other side to make a flying geese unit. Make 4.
Step 9. Sew one Print 6 strip to each end of each flying geese unit.
Step 10. Arrange the star block, the units from step 9, and the remaining Background B8 squares. Sew the units into rows, pressing seams in alternate directions. Sew the rows together and press seams open.
Step 11. Sandwich your quilt top, batting and backing, and quilt as desired. Either add binding now for a mini quilt, or, hem one long edge of each pillow backing piece by folding it over 1/2″ and then another 1/2″ to enclose the raw edge. Place quilt top face down, and place backing pieces right-sides up on top of the quilt top, aligning the outer edges with a 4″ overlap in the middle. Stitch around the outer edge 1/8″ from the edge to baste in place. Bind as usual.
This block would also make a fantastic quilt when used in repeat, with those yellow lines joining up to create a square. And being a large quilt block, the quilt would come together pretty quickly too! Whether you make just one, or many, we’d love to see it. Share it on Instagram using #MartiMichellMiniQuiltMania and #nebulaquilt, and tag us – @blossomheartquilts and @gnomeangel and @martimichell – to be entered in the giveaway.
This post contains affiliate links.


Susan says
Love your mini quilt. That’s a pattern similar to one of my favorites, so I think I have to try this one.
Alyce says
Thank you so much, Susan! You just can’t keep me away from stars, haha!
Susan says
Ha! Me, either! Maybe that’s why I like it so much. =) I have to catch up (again!) on HST first, but this could be my October baby quilt center.