Knowing how to baste a quilt is an important step in the quilting process. But unlike roasting Thanksgiving or Christmas turkeys, there’s no meat juices involved, just some tape and curved safety pins or basting spray! Basting is what the process is called when you layer a quilt top with batting and backing fabric (affectionately referred to as a quilt sandwich), using pins or basting spray to temporarily hold it all together so that you can quilt it together.
Note – if you are sending your quilt top to a longarm quilter, then they will baste the quilt for you before quilting it. Although it’s important to also note that most longarm quilters offer thread basting services as well, ready for you to then quilt!
What you need to baste a quilt
There are two main ways to baste – with basting pins that look like curved safety pins, or basting spray – a temporary adhesive that is washable and safe to use on quilting materials. Regardless of your chosen method, you will need:
- Quilt top
- Batting
- Backing fabric
- Tape
- Space
Quilt top
Your quilt top should be neatly pressed, and all loose threads snipped off. Once your quilt is basted, it’s extremely difficult to fix any wonky seams, or stray threads, that are showing through lighter fabrics.
Batting
What batting you choose to use for your quilts usually depends on two things – the purpose of the quilt, and your budget. If your quilt is headed to a cooler climate, then you might like to consider a wool batting for added warmth. Wool batting is also used to get extra loft (slight puffy definition) when quilting, and it can hang more nicely if used for show quilts or wall hangings. If the quilt is for a more temperate climate, cotton is more lightweight, and it’s got the added bonus of being cheaper than wool or bamboo. The cheapest option is a cotton/polyester blend.
Batting is the kind of quilting material that is best experimented with to find what suits both your budget, and machine needs. When I first started quilting, I used flannel, as it was beginner-quilter-budget friendly. It got the job done, but it’s certainly not as snuggly soft as batting. Then in Japan, I used 100% cotton batting, which only came 1 metre wide #frankenbatting So just once, I tried a polyester batting as it came in a wider option. My machine hated the polyester batting, though!
Now that I’m back in Australia where I have some more options, I mainly use Legacy cotton/poly blend batting (60/40) as it’s good quality, suits the warmer Australian climate, and when bought on sale, is under $100 for a 13.7m/15yds roll. I have also used Quilter’s Dream for a hand quilting project, and liked that too.
Whatever you choose, and there’s no quilt police here to judge your choice, the main thing to focus on is cutting it to size. You will want your batting to measure approximately 2-3″ larger than the quilt top on each side. If you’re basting a table runner or cushion (like I’m using for this tutorial), than you can get away with about 1″ around each edge instead.
Backing fabric
I shared a long post last week about choosing backing fabric for your quilts, so I’ll simply remind you of the key point – the backing fabric should be at least 4″ larger than your quilt top on each side. This means that for my baby Geode quilt, that measures 48″ square, my backing fabric should measure 56″ square. Although, in full honesty, the smaller your quilt and the more experience you have at basting and quilting, the less excess backing you will need. But if you’re still a beginner when it comes to basting and quilting, definitely err on the side of generosity.
Tape
To make sure that layers don’t move whilst basting, we use tape to hold things down. You can pretty much use any tape you like – painters, washi, masking, or even plain sticky tape! As long as it won’t effect the surface you’re basting on, and is wide enough to get a firm grip on both the backing fabric and the surface underneath, use what you have. For larger quilts, I have 2″ masking tape from the local hardware store. For smaller projects, I use a bit of washi tape (of which I have a large stash and never end up using for anything else…).
Space
This is the trickiest part. To successfully baste quilts without wrinkles and creases, you will need a large, hard surface. This may be a floor, a table, or even a wall! Ideally, we would all have space large enough to comfortably spread out our quilts to baste, but that’s far from the truth for most of us. In these tutorials, I’ll be sharing the basic principles for pin basting and spray basting using my kitchen table, and sharing some links to other quilters who have shared some great work-arounds for limited space. For projects up to baby-size, I can use my kitchen floor. For larger projects, I take to craft and sewing groups I regularly attend and use the larger tables or floor space available at those.
The first step in any basting method is to make a quilt sandwich.
How To Make a Quilt Sandwich
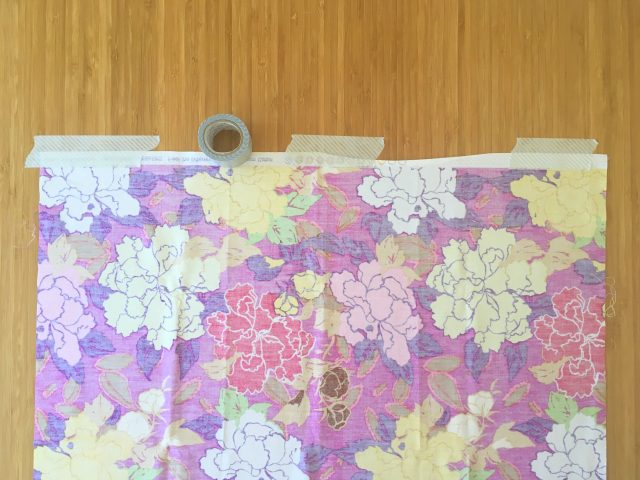
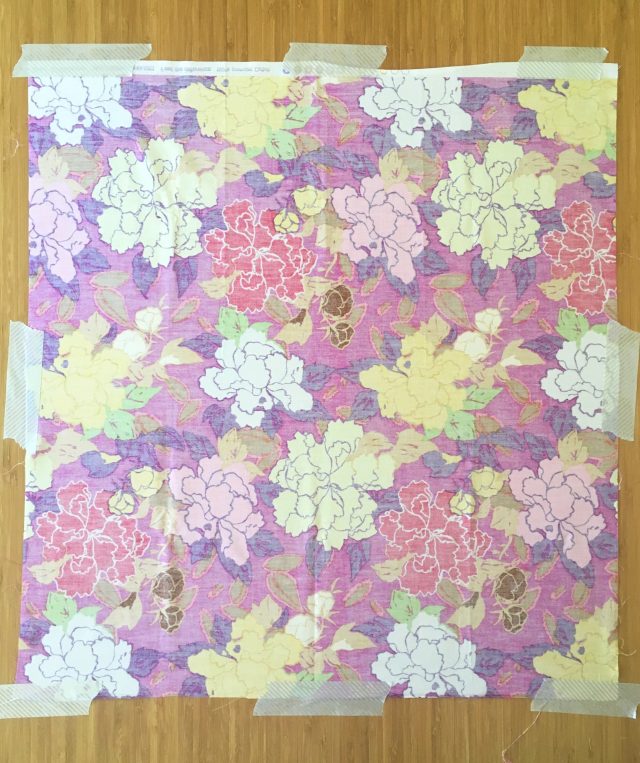
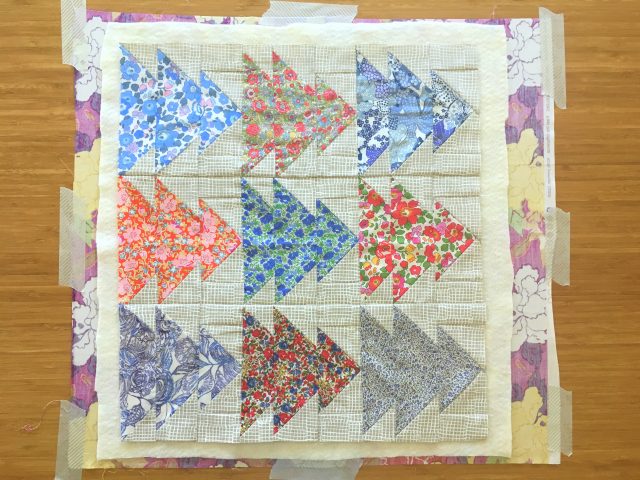
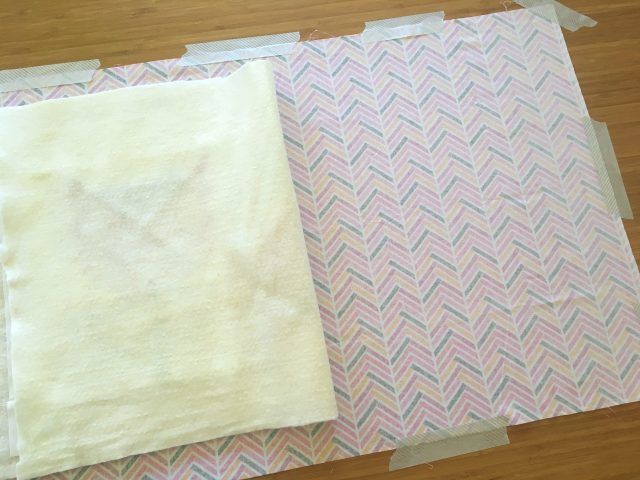
Lay your backing fabric right-side down, and use tape to firmly secure one edge of the fabric to the surface below.
Next, tape down the opposite edge, before doing the sides.
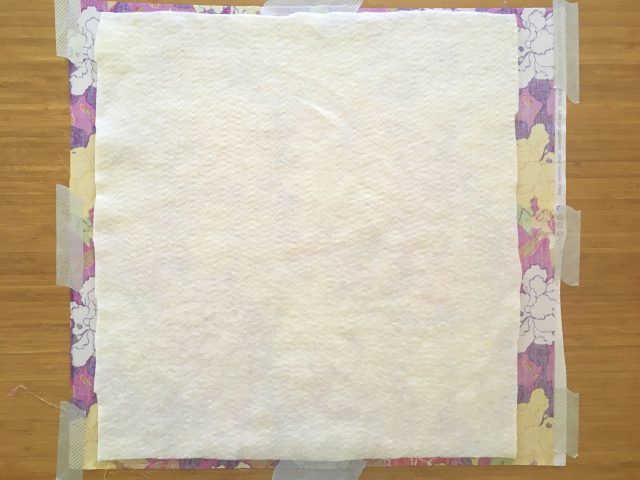
Place the batting in the centre of the backing and smooth it out evenly.
Place the quilt top right-sides up in the centre of the batting, smoothing it out so that there are no wrinkles or creases.
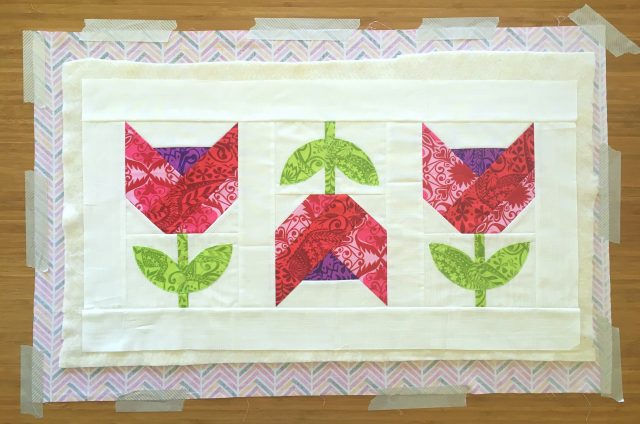
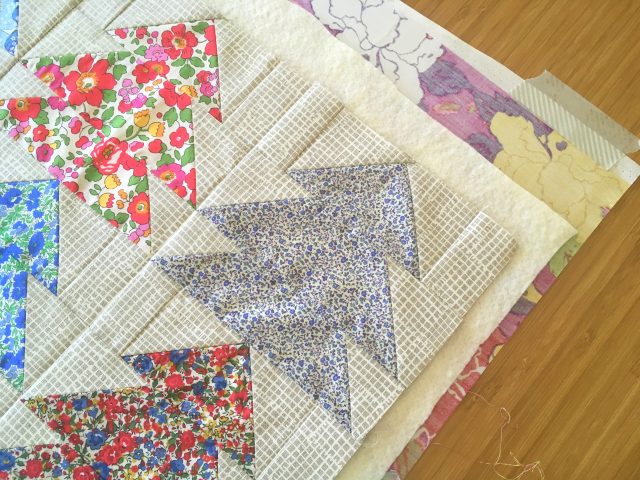
You should be able to see all three layers – top, batting, and backing – along all edges and at each corner.
And baste!
How to pin baste a quilt
I would take a guess and say that pin basting is the most common way for basting a quilt. All you need is a pack of basting pins (curved safety pins) that you can reuse over and over. Some people like to use something to help them close the pins more quickly and easily (and without hurting your fingers!) like a Kwik Klip, or even a spoon.
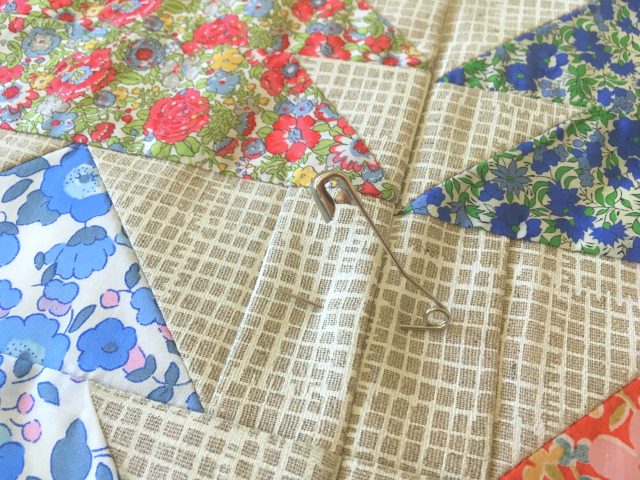
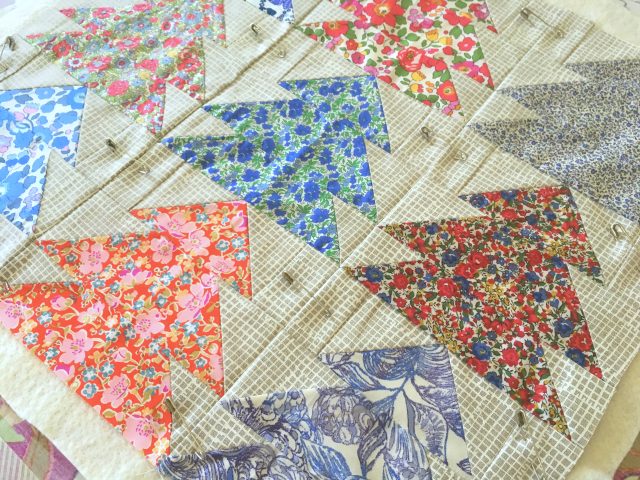
Once you have made your quilt sandwich, have a quick think how you are planning to quilt your project. You want to placed the pins evenly and regularly enough across the quilt top so as to safely secure the quilt sandwich, but if you already have a quilting plan, you can then try and be smart with where you place the basting pins so as to not be toooooo in the way when quilting. For this cushion, I plan on outlining the negative space (upside down trees!) in between the Liberty Christmas trees. So I placed the pins in the middle of the spaces.
Start pinning from the centre of your quilt and work out from there. It’s important to make sure that your quilt top stays flat and square, so be careful to not stretch and pull it too much – “smooth, don’t stretch”.
As for how many pins to use, a good rule of thumb is if you can place your hand on the top and not be touching any pins, you haven’t used enough. Basting pins need to approximately 4-5″ apart.
It’s also extremely helpful if you place them in an orderly fashion – oriented the same way and in the same positions, such as in the same sections in each block. That way, while you are quilting, it’s quickly becomes predictable as to when you are going to come across a pin and you are less likely to stitch one to your quilt… ask me how I know about that!
Pin basting on the floor can take a toll on your knees and back, so using a table is a great way to alleviate the physical discomfort. Ms Midge has a great tutorial for how to pin baste large quilts on a table. Another option people like to use is board basting; this video by Sharon Schamber shows how she uses boards for hand basting – just swap to pins to use this method for pin basting!
How to spray baste a quilt
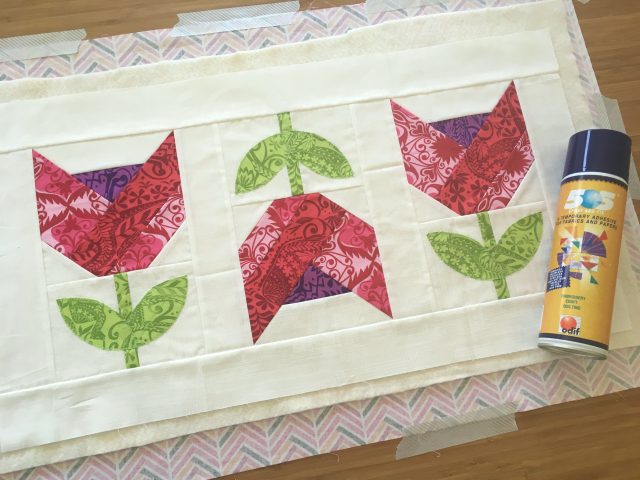
There are a few different basting sprays on the market, with the most popular option I’ve seen being the 505 basting spray that I also use. It has minimal odour and works beautifully to keep my quilt sandwiches together until I’ve finished quilting (however long that may take!).
You will need to spray baste in a well-ventilated space, and be aware that you will get some overspray where some of the glue will land on the surface around your quilt sandwich. Good basting spray is not going to damage anything, but it’s wise to wipe everything down afterward so that you’re not left with a sticky floor or table!
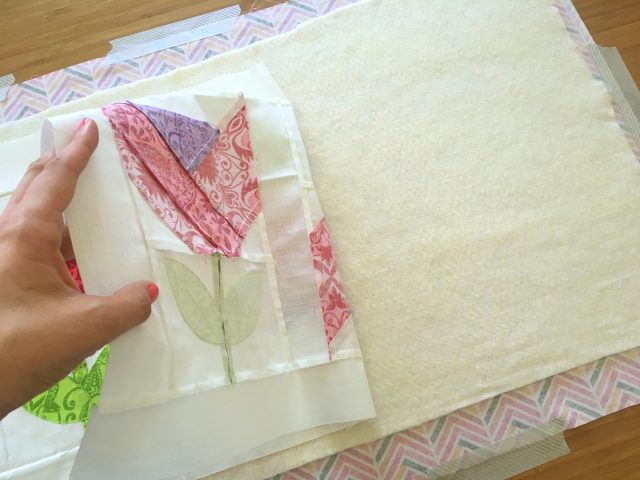
Prepare your quilt sandwich, just like for pin basting. Pull back half of the batting and quilt top to reveal the quilt backing.
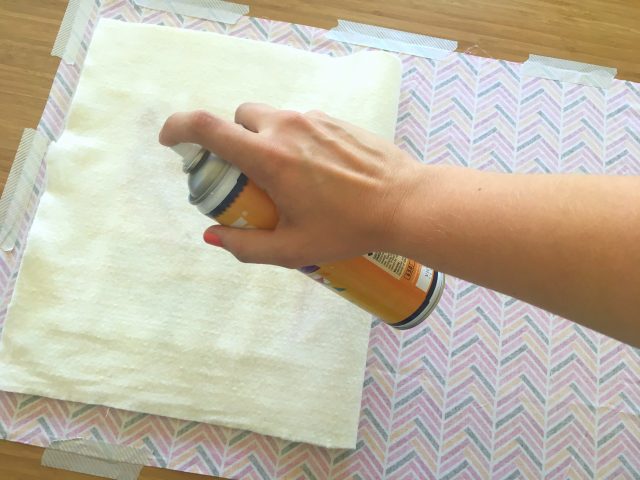
I personally prefer to spray the batting, but others spray the fabric. Either way, follow the instructions on your spray can for how far away to hold the can while spraying. For a small table runner like this, I can spray all of the exposed batting. But for larger quilts, it’s best to work in about 12″ sections from the centre of the quilt out to the edge.
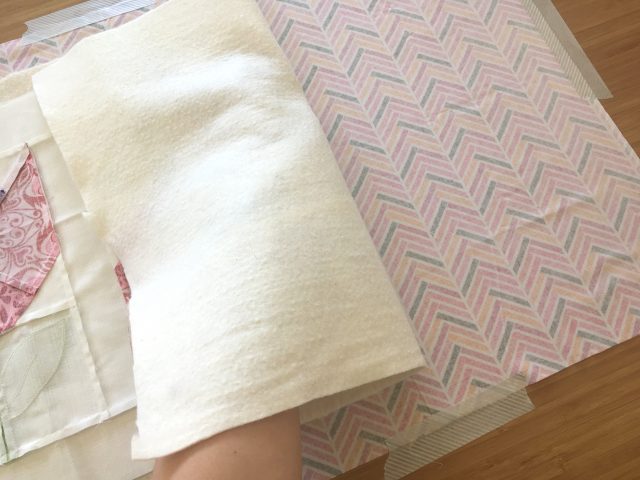
Once sprayed, use your hands and arms to gently and smoothly press the batting and backing together, just like you do when contacting school books! Once you have finished that half of the quilt, repeat for the other half of the batting/backing.
Repeat the same steps for spray basting the top and the batting – half of the quilt at a time.
And just like that, your quilt is ready for quilting!
You can also spray baste large quilts on tables as shown in the video by Sam Hunter. Christa Watson has a great tutorial for spray basting using your design wall.
Your Quilt Basting Tips
As with all things quilty, there’s always plenty of different ways in which to baste your quilts! Feel free to share your own tips and tricks in the comments below, or ask any questions you may have.
This post contains affiliate links – thanks for your support!

Judy H says
another idea if you need space….your local library. Most of them have meeting rooms and if nothing else you can put tables together and use that to lay out your quilt at table top level.
Alyce says
Great idea!
Denise S says
Here is my favorite youtube tutorial on how to baste a LARGE quilt on a SMALL table. This method works.
https://www.youtube.com/watch?time_continue=1&v=jnke_KzeTI8
Alyce says
Youtube videos are great for tutorials!
Cathy says
I tried it all, pins, spray, but the fabric still shifted when quilting. I was so frustrated I was ready to fuse all the layers together. Then in desperation I tried using Elmer’s School Glue. It’s washable but holds everything in place. I buy it by the gallon. I just squirt it on the batting in narrow streams about 1” to 2” apart in a crosshatch pattern. Nothing fancy, and don’t spread it out. Lay the top on the batting and smooth everything. Let it dry for a couple of hours then turn it over and apply the backing in the same way. Let’s it dry overnight before quilting. I don’t even use a walking foot when I quilt and I don’t get one pucker. I buy a gallon of the glue for about $11 and that is enough for several quilts. It is much cheaper and holds better than spray, and is faster than pins. I told an acquaintance about it recently and she emailed me and said she will never be without it in the future. Try it out on a table runner or potholder. I think you will be amazed. Just wash the quilt when you are finished and it disappears. Don’t overdo it. Just light streams of glue.
Alyce says
Wow, I haven’t heard of that before! I guess it’s similar to glue basting English paper piecing?
Cathy says
Not exactly. I use liquid glue. I had seen videos of people using a small amount to help when attaching a binding, and I thought, why not the entire quilt. Actually, I tried a table runner first. Because the small bottles of glue squirt so slowly, I eventually purchased a large bottle of carpenters glue at the hardware store, emptied and cleaned it, and use it for my Elmer’s because of the larger size meaning less refills. I also tried spreading the glue with a paintbrush but that made the entire quilt stuff like a piece of cardboard. Just streams of glue is best. The fabric remains pliable, and when you are finished it all comes out in the wash. It’s fast, inexpensive, and no bad fumes. I no longer dread basting or quilting. I’ve basted at least a dozen quilts, even one king size, using this method.
Alyce says
Ah yes, I gotcha now!
Primrose says
Hi Alyce – would love to know where to find that tulip pattern – ideal for our Spring Fling retreat next March.
Alyce says
It’s the Dutch Tulips pattern by It’s Sew Emma from Fat Quarter Shop.
Tami says
Thank you for all the ideas! I prefer spray basting now and spray baste my quilts in two steps. First I glue the backing to the batting and iron the whole thing to smooth out any wrinkles. After the backing is smooth, I spray baste the quilt front to the backing/batting layers and iron again. Starching the layers first also helps but I don’t always do that step.
Alyce says
I must say, I’m yet to iron the layers, but I should try it one day when it’s a quilt that I have the space to iron it!
Cocopatch says
thanks for sharng your tips!
Alyce says
My pleasure!
Fran Kish says
Hi ladies have a challenge to finish before Easter Sunday with our Patchwork group and being a procrastinator and making other quilts I’m in a rush to finish. Today I tried my first spray basting. Loved it. Had half of the quilt pinned but decided to look up how to use the spray. Very happy with how it works. I’m converted and so much quicker than pinning. And I guess great for smaller item.
Happy Easter everyone. 🌺🙋👏