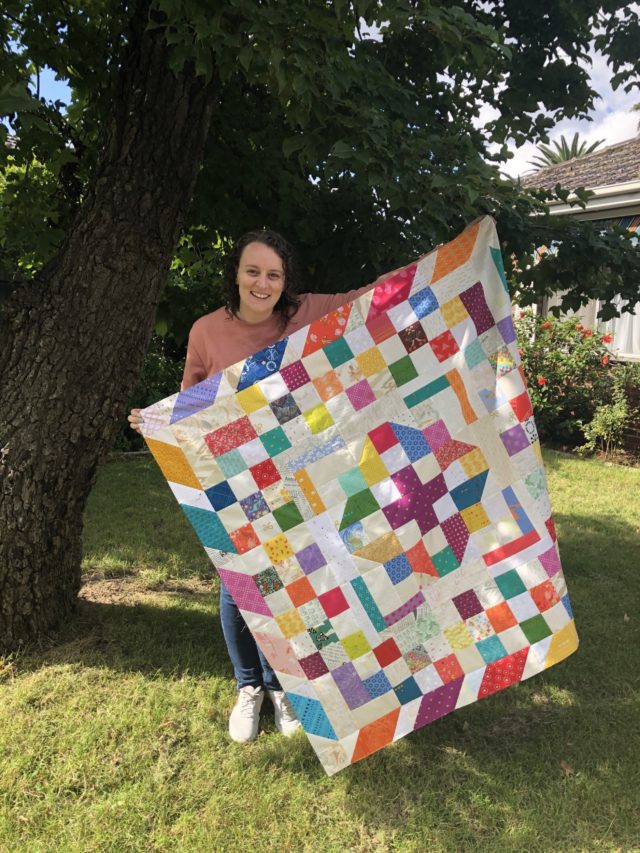
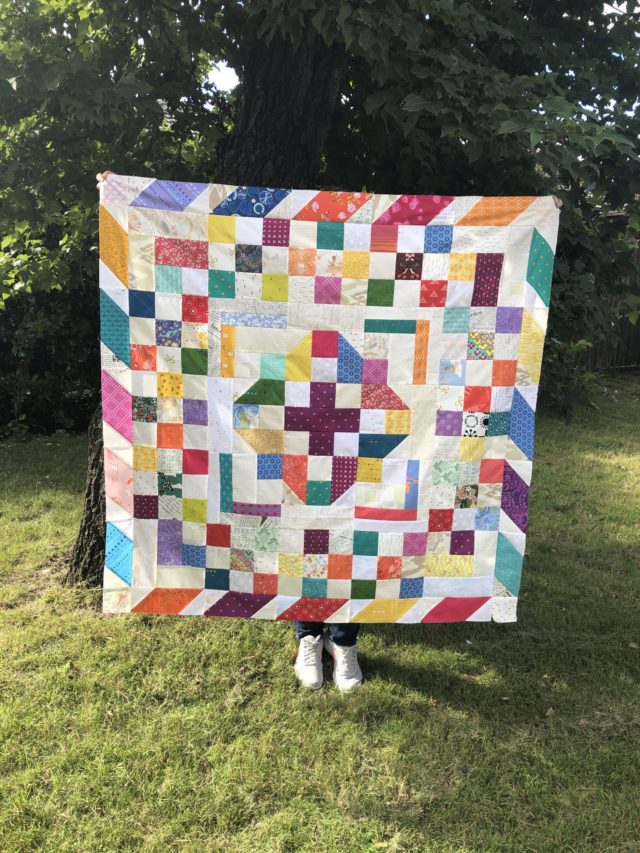
Today’s the day we finish our Happy Scrappy quilts!! Putting all those Ribbon blocks to good use. By the way, all these Ribbon blocks will have left you with 40 pairs of scrap triangles. On Monday, I’ll share a blog post of ideas of what you can do with them – whether you’ve sewn them into half-square triangles or have a pile of them lying around! But until then…
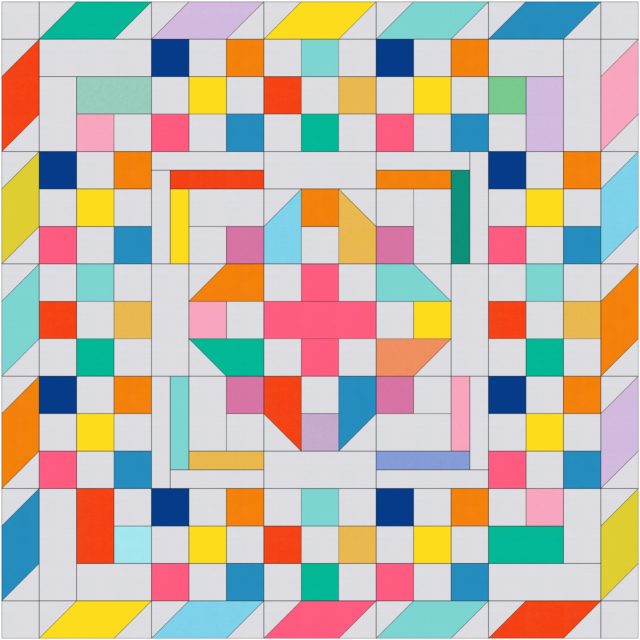
As a reminder, here’s all the blocks that you will need to have made for your full Happy Scrappy quilt:
- 1 Cross block
- 20 Ribbon blocks
- 4 Arch blocks
- 8 Print Nine-Patch blocks
- 4 Skinny Strip blocks
- 4 Background Nine-Patch blocks
- 4 Bold Brick blocks
For the final border, you’ll need:
- Ribbon blocks
- 4 – 3.5″ x 3.5″ background squares (or print! Choose your own adventure…)
Use a 1/4″ seam. Press seams open unless otherwise directed.
Step 1. Sew the Ribbon blocks into four rows of five blocks each. Press.
Step 2. Sew a 3.5″ square to each end of two of the rows. Press.
Step 3. Sew two rows from step 1 to opposite edges of the quilt top. Press. Sew the two rows from step 2 to the remaining edges of the quilt. Press.
Now, if you have made a mix of the direction of the angles of your Ribbon blocks, then what I suggest is to do two border strips from each set of angles. and put them on opposite sides of the quilt. Like this:
Finishing the quilt
Once you’ve pieced your quilt top, you’ll need:
- 59″ x 59″ of batting
- 3 1/2 yards of backing
- 1/2 yard of binding
From the backing, cut 2 – 1 3/4 yds x WOF
From the binding, cut 5 – 2 ½” x WOF
Remove the selvedges from the backing fabric and sew the pieces together along the long edge using a ½” seam. Press the seam open.
Press the quilt top and backing well. Make a quilt sandwich by placing the backing fabric right side down, the batting on top, then the quilt top centrally and right side up. Baste all the layers together using your preferred method.
Quilt as desired. Once my dining table is cleared of school work tonight for the weekend, I’ll baste my top and use the serpentine stitch my Pfaff Passport to do a wavy stitch quilting across the top. Here’s more machine quilting tips I’ve previously written about.
Trim the selvedge off the binding and sew the strips together to form one long strip using a diagonal seam. Press the seams open, then press the strip in half along its full length, wrong-sides together. Attach the binding using your preferred method – here’s my method of how to machine bind a quilt.
Finally, snuggle and enjoy the quilt!
Share your quilts using #happyscrappyqal on Instagram and in the Blossom Heart Quilts Facebook group! I can’t wait to see your finished quilts!
How to make the Happy Scrappy quilt bigger
The quilt finishes at 51″ x 51″. That’s a lovely little lap size, or a great kids’ size quilt. But sometimes you just want a quilt that little bit bigger. If that’s the case, then I have a solution for you!
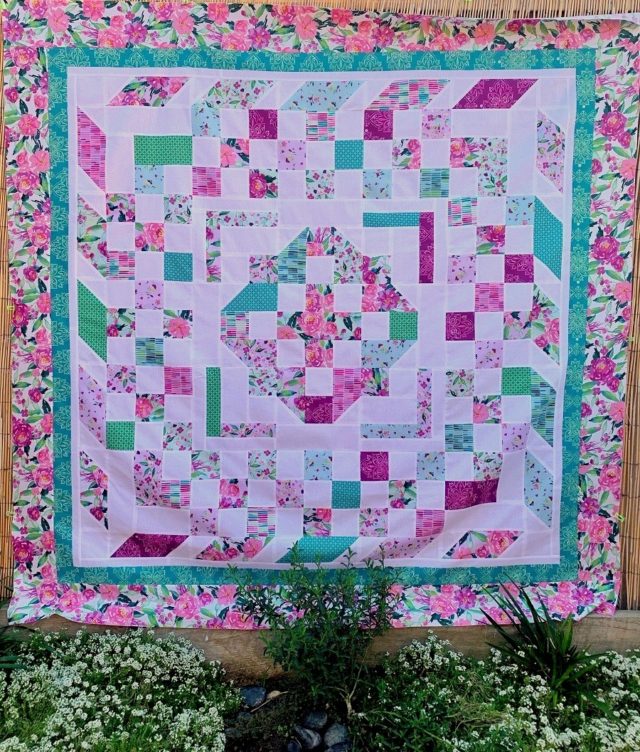
Sarah from Piccolo Studio is a dear friend, and we have a fun story of how we first met and then reconnected years later… I’ll save that for another time, because I’m hurriedly writing this in between juggling my kids’ online learning and who need which device and who’s turn it is for my laptop! So, Sarah was making a quilt for Riley Blake Designs using the beautiful Hampton Garden fabric range, and decided to use Happy Scrappy… but she wanted to make it a bit bigger and show off a gorgeous floral fabric. I asked if she was happy to write up how she did so, and thus, Sarah has all the information in her blog post here for how to add an extra round of borders to bring the quilt up to around 67″ x 67″.
It’s a beautiful way to finish off the quilt if you’d love to make it bigger. You’ll need to adjust the batting/backing/binding accordingly by adding an extra 16″ to the batting and backing, and an extra 2.5″ x WOF strip of binding.


Barbara argent says
Thanks. Alyce. Have enjoyed your quilt cal. Certainly kept me occupied.
Have shared it with a good friend in Germany. I really appreciate the .
Bye Barb
Alyce says
My pleasure, I’m glad you enjoyed it!
Nadine says
This has been a fun project
Could you encourage people to share how they quilt it. I am teaching remotelyand helping little grandchildren with home schooling and don’t have much creative space left in my brain!
Alyce says
I’m glad to hear it 🙂 I highly recommend joining the Blossom Heart Quilts group on Facebook – there’s lots and lots of Happy Scrappy quilts being finished in there, so you’ll be able to easily get ideas.
Angela Markovich says
Is it too late to get the free pattern?
Alyce says
You can find all the instructions on the various blog posts linked in this post.