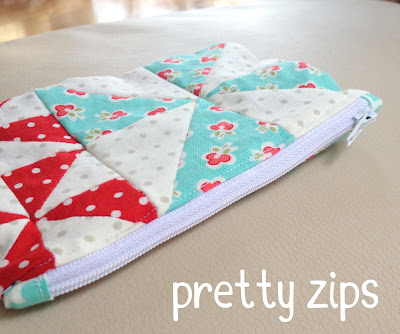
Learning how to cover zipper ends properly will add the perfect, professional touch to zippered pouches. Making pretty ends for your zippers are very quick and easy and require very little fabric! You can make them to blend in with the zip or the pouch, or even make a statement like the orange ones on my Totoro nappy wallet.
What you need
– zipper
– scrap of fabric at least 2″ x 3″
– you can use your normal sewing machine foot for this
1. Fold your piece of fabric in half along the length, wrong sides together and press. Fold each long edge in to the middle to meet the crease and press. I use my Clover finger presser for little pressings like this! Fold in half again.
2. Measure and mark your zip 1/2″ shorter than your fabric for the pouch. This means that when you sew the final, outside 1/4″ seam, you do not catch the zipper tabs in the seam, creating a clean finish. Make sure your zipper pull is on the inside of that mark like in the picture. Cut your zip neatly. Repeat for the other side.
3. Cut your fabric in half. Slip your zipper end into one of the pieces of cover fabric so that the end of the zip sits against the crease. Sew it onto your zip as close to the edge of the fabric as possible, remembering to backstitch at the beginning and end to secure it properly. Trim any leftover bits of fabric hanging over the edge. Repeat for the other side.
4. Go ahead and use it as a normal zipper with it’s pretty covered ends!
If you have any questions on how to cover zipper ends, please don’t hesitate to ask. Share your zipper successes with me on Facebook or Instagram – @blossomheartquilts!


Cherie says
Thanks for the tutorial. When I tried before they didn’t turn out so neat. I’ll try this method next time =D
Books_Bound says
Don’t you just love Vintage Modern? The blue with little pink buds is my favorite!
Sarah Lou says
Thanks Alyce, I’ll have to try that on my next one. I love the blocks on the outside too!
marsha says
I tried this yesterday and it worked great. I posted a picture on flickr: http://www.flickr.com/photos/coolquilting/8651242892/in/photostream/
and linked to your blog with a link in my blog in the comment section.
Kate says
Terrific idea – thank you for sharing.
Carrie Cunningham says
Thanks for this tip! I just started making bags and this technique will be most helpful!
s2toot says
Thanks so much, great tutorial!
DorothyVP says
I love it. I will defiantly use it. Thanks