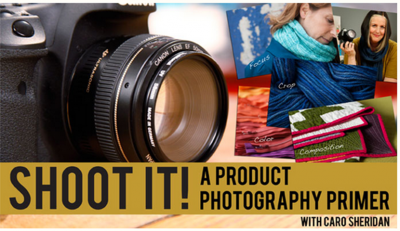
I have loved slowly working through Caro Sheridan’s Craftsy class – Shoot It! A Product Photography Primer. It’s the kind of class you can mostly listen to while doing other things, as long as you can still watch it whenever she shows photo samples or diagrams. And she’s really easy listening too! Very casual and natural and engaging.
Before getting into the technical how details, Caro first goes into the why and what of your product photography. First you need to determine whether you’re selling a pattern or products/supplies, or a finished product. Patterns and supplies need to sell something to a broader base to entice them that they can work with it, as opposed to a finished product which highlights the work that you did.
Either way, there are three things you need to be aware of:
Solid photography – You need good quality photos so as to not distract from your product with bad quality photos.
Color Selection – Choose what colours you use for both the product and the background that will compliment your product.
Styling – What story do you want to tell? What mood do you want to portray – practical, aspirational or inspirational?
After walking through things you need and tips and tricks for actual photo shoots with a model, as well as a sample photo shoot with a model sharing poses and angles, Caro talks about all the technical stuff of photography – ISO, aperture, shutter speed, exposure, white balance, oh my! But the one thing I really learned this first time through was about white balance and histograms.
I’ve been working on trying to improve my blog photos (aren’t we always?!) and my husband keeps talking about ‘histogram’. All I could see was a graph-like mountain range of coloured lines and patches. But Caro explained it really clearly, and now I get it!

{source}
The left side is the darks – the shadows and contrast. On the right is the light – the highlights and brightness. In the middle is the midtones – the colours. If the big mountain is too far to either side, it’s going to be too bright (if it’s on the right) or too dark (if it’s on the left). You want to hit the middle. This is something my camera doesn’t let me adjust manually, but by trying to take a good photo to begin with, Picasa lets me adjust all these things when editing my photos, and now I understand what it’s doing!
I could go on and on, but essentially all you need to know is that this is probably the most useful Craftsy class I’ve ever signed up for, and is one I will definitely be watching over and over again! A proper photography course is on my return-to-English-speaking-land bucket list, but this class has definitely helped me understand the basics a lot more. If you’re similar – want to improve your photography for whatever reason but can’t get to a class in person, I highly recommend checking this class out! And with the huge up-to-75%-off sale happening now and finishing tonight (21/9 US time), the class is 50% off – only $24.99!
*proud Craftsy affiliate

Kathy @ Kwilty Pleasures says
In have signed up for it….going to watch it and practice during an upcoming vacation! Nice review!
Steffi says
Hi Alyce,
just wanted to let you know that your envelope with the two purple fabrics arrived. Thank you very much, I love them! And now I have my very first JoAnn fabric. For me, that is pretty cool. 🙂
I hope you’ll have fun with the christmas fabrics, too.
Greetings from germany,
Steffi
Gerry says
You are absolutely correct by referencing the ability to “tell a story” with image you are going to take. There are so many factors that make of the “mood” of the of your photography. Thanks for sharing!
Shanna @ Fiber of All Sorts says
I’ve been waiting for something just like this. Thank you for the review!