One of the coolest things that has repeatedly come out with starting The Bee Hive swarms was that this is the first quilting bee for so many of you! You asked the question, “To bee or not to bee*…” and decided that this was definitely the time to bee, and I’m truly honoured and grateful that you have trusted me and the guest designers enough to take this big step and commit to our block designs!
*Sorry, had to fit that in somewhere!
I wanted to take the time to have a good, honest chat about good quilting bee etiquette that will teach you how to be a fantastic bee member so that this experience is smooth and easy and fun for all! I’ve been in several bees, with varying degrees of success and fun, so you can be sure that I’m speaking from experience here – both as a queen bee and as a “worker” bee!
Expectations
Let’s start with general expectations. In a quilting bee, you are working with 12 different stashes and 12 different skill levels. Keep that in mind at every point of the journey! It is definitely fair to expect good quality fabric that isn’t see through; it is definitely ok to expect a block that isn’t wildly oversized or undersized. But remember that you cannot dictate the exact shade or print people use and you need to be accept that you may be sent a block that is 12.25″ or 12.75″ instead of 12.5″. Obviously as close to 12.5″ is best, but as no one is perfect, I personally believe that a +/- 0.25″ is acceptable. Queen Bees – you can fudge your quilt seams a little bit accordingly easily enough by either trimming slightly or stretching that fabric just a smidge.
It is also fair to expect good communication between bee members. Whether it’s via Facebook or email or Instagram, it is important to regularly update your bee members on your progress on their blocks or if you’re queen bee, to get your block selection and colours/fabrics to them in a timely manner.
Queen Bees
It’s finally your month, and you’ve been thinking and planning your block and dreaming about the resulting quilt all year! Here’s some pointers for you to remember:
It is good etiquette to make up your own block ahead of time, using the colours and fabric placement you want, so that the worker bees can refer back to your example when working out what fabric to use or where to put it.
Let your group know your choices early. The earlier you let your bee know your choices, the quicker they can get to making your blocks! Generally, the 1st of the month is standard, or by the end of the first week at the latest.Trust me when I say that bee members will start to (gently) nag you if you don’t make up your mind soon enough!**
You are allowed to be fussy, but not too fussy. This is, after all, going to be your quilt in your home, so don’t be afraid to (gently) speak up if someone is using a print that you just really can’t stand or a light blue when you asked for navy. But at the same time, be mindful that this print may be the only suitable one in your chosen colour! It is a fine line, but you are all adults and know how to play nicely with some give and take from all sides, mkay?
**If you are a member of a swarm for The Bee Hive: Two weeks before the end of each month, the Swarm Leader will contact the next month’s Queen Bee and ask them to lock in their block choice and colour scheme. One week before the beginning of the new Queen Bee month, the Swarm Leader will contact the Swarm and them know the block and colour scheme the Queen Bee has chosen.
Worker Bees
Let’s start from the very beginning, a very good place to start… Fabric selection.
You must use quality, 100% cotton, quilting weight fabrics. The common term is “quilt shop quality”, which means the nice, good-quality quilting weight cotton from quilting stores and not the thin, see-through, cheap sheeting cotton you picked up off the clearance table at Spotlight/Joann’s. This is especially true when selecting a solid to use. Unless you’ve been specified to use a particular brand and colour, using homespun (or a generic, no-name solid) is definitely acceptable if it has a good weave (the threads are tightly woven together and not coming apart) and isn’t too rough. Many homespun solids will feel quite coarse to the touch, and may even be a little stiff. That’s not fun to work with nor nice to snuggle!
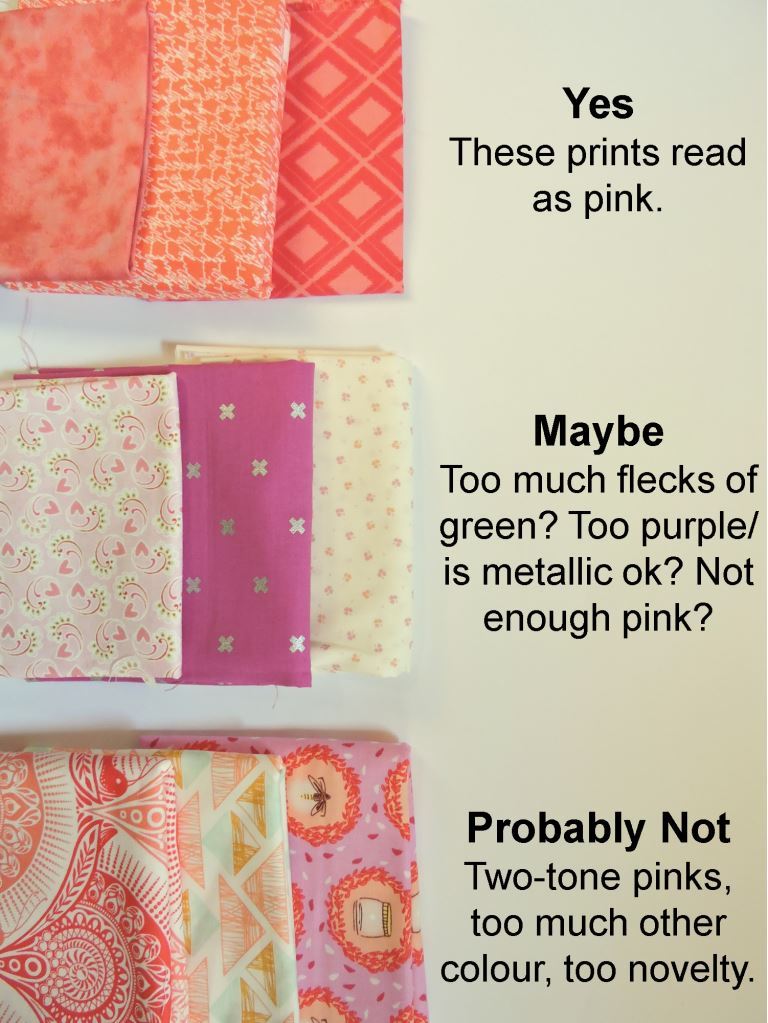
Be mindful how the print and how reads as a colour overall – the queen bee asked for a bright, saturated pink, so select a fabric print that actually looks like a pink overall, and not a light, stripey pink or a multicoloured pink print, even if it is a gorgeous Arizona triangle print. Also, quilting bees are not the place to get rid of that really ugly print you’ve had hanging around like a bad smell for way too long. Use fabrics you would be proud to have as an example of your style! If you are really unsure, ask your queen bee, but do use common sense and trust your gut instinct to make sound design choices.
Be prepared that you may need to buy a little bit of new fabric. I mean, it’s very rare that having to buy some new fabric is bad news, but you may just really not have on hand anything appropriate. I certainly would struggle to find anything dark green in my stash! Sometimes there are colours or shades you just don’t tend to stash so you may need to buy a small cut of fabric for that month’s block. Such is quilting bee life.
Use one thread colour throughout. Whether you use polyester or cotton thread, it’s not really going to make a difference overall as long as it’s a 40 or 50 weight to keep the seams thin. But for the love of all things quilty, choose one colour and stick with it! I actually have been sent a few quilting bee blocks where, amongst a myriad of other issues, the sewer had used a variety of pink, grey, white and dark blue threads. In one 12.5″ block. How can you actually even physically do that?! Sew one seam per day amidst a wide range of other projects?! If you’re sewing with light colours or a light background fabric, use a white or off-white thread, or even a very light grey. If you’re sewing with black and other dark fabrics, use a dark grey or black thread. And use the same thread in the top and the bobbin.
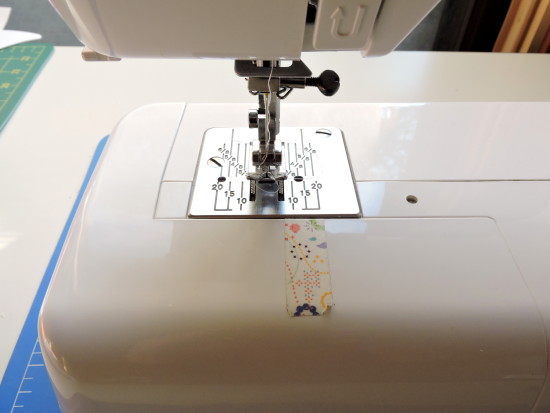
Talking of seams, sew straight. That’s just a standard, basic sewing skill but I’m going to mention it anyway. I highly recommend that at the very least, if you don’t have a quarter inch foot, use some painters’ or washi tape to mark the 1/4″ seam mark on your sewing machine. This is what I do and it’s really useful! The edge of your normal machine foot or feed dogs probably won’t a proper 1/4″ from the needle, and as we all know, an accurate 1/4″ seam is the real secret to accurately-sized quilt blocks (and thus quilts!).
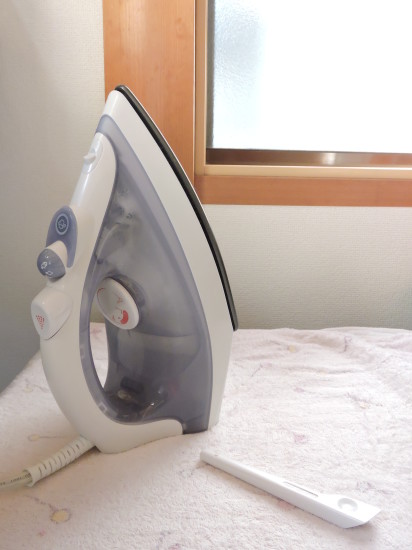
Once you’ve sewn those seams, press all your seams. When you’re sewing your own projects, you may be like me and skip the occasional pressing, because it’s not for anyone else and it’s just one little way to be lazy. But when I sew anything for anyone else, I press every seam. A quick finger-only press for small seams maaaay be alright, but often it’s not firm enough to really press properly. I use a Clover Finger Presser for most small seams and it makes a really crisp fold on them. Once I’ve sewn a quilt block row together however, I use the iron to press, not iron. Ironing will stretch the fabric even just a little bit and can distort the block. And you know what? I just have a $20 iron and a towel on the small table next to my machine! You don’t need a $100 iron and big ironing board! That would sure be nice, yes, but definitely not necessary to press seams properly.
You also need to press your seams as the pattern instructs. Any good pattern will tell you which way to press seams, but if all else fails, press towards the darker print. Especially when using white! And when you’re sewing quilt block rows together, you may find that your seams already tend to lean away from the bulky points (usually towards the centre row). Don’t fight them, just press away from the bulkier points, or press the seam open.
Finally, complete your blocks on time. Queen bees are very excited to get their blocks and see them all together; you will certainly be the same when it’s your turn as queen! So try your hardest to get your block finished and in the post by the end of the month. Life happens, we all know that it does, and maybe you need an extra week to get the block into the mail – just communicate with the queen bee and let her know you’ll be a little late!
A note on posting – When you send bee blocks, there is never an expectation of sending anything else, but we all know that a few large scraps from the block or a bonus fat eighth of fabric would never be unwelcome! At the very least, pop in a little note to say hi – that’s just being a lovely little bee! And most importantly, package all fabric in a snaplock bag – sometimes postmen aren’t very careful with envelopes, and the last the queen bee wants to do is open her letter box and find a soggy, stained quilt block! Snaplock bags are cheap to buy from your local cheap store or supermarket, and are very useful to have on hand in your sewing room for whenever you send any kind of fabric-squishy goodness through the mail!
The Bee Hive Swarms
Alright, let’s talk specifically about the Swarms for The Bee Hive. By now, you have been allocated into one of 21 swarms and you know your fellow bee members and your swarm leader. Angie has also done a fabulous job of communicating regularly and fully via email, as well as on her blog, so together with this post, you also have just about every piece of information you need for the year. But you still might have some questions, and that’s ok! Here’s who to ask, and how:
General bee/swarm questions – your swarm leader.
Rather than inundate Angie or myself with multiples of the same question, please ask your swarm leader via email. She may already know, or can at least ask in the Leaders’ Facebook group so that other leaders will find out the answer too for their swarm members.
Block instruction/technique questions – me.
If you have questions regarding the technical construction of your blocks or a query about the tutorials themselves, leave it as a comment on the specific block tutorial blog post you’re wondering about. I or the guest designer will answer the question directly in the comments section (which will automatically be emailed to you) so that everyone else can learn from that question/answer too. And let me say this upfront now, if you’re having block-size issues, double and triple check your seam allowances first, especially if the block has a higher number of seams and/or rows.
Monthly bee block questions – the queen bee.
When choosing fabrics to use for that month’s block, it’s really easy to second-guess and doubt your choices. If you want to double-check, contact the queen bee directly, preferably via Instagram using #thebeehivequiltswarm[leader’s name] and tagging them, or even the Facebook group, so that your other swarm members can see and use the answer to help them in their choices too.
One exception – Once you have read this post and Angie’s post and her emails, and you still have some questions regarding how a quilting bee works or good quilting bee etiquette, that’s ok! Today is the day/week/post to leave a comment on this blog post. We will answer all the questions as a direct reply on this post (which will be automatically emailed to you) so that others can learn from your question too.

And finally, several of you have been asking for a button to add to your blog, which you can grab from here! I’ll also pop it onto the main The Bee Hive page for future reference.
Thank you once again for joining us on this fun adventure! Here’s to a quilty 2015 here at The Bee Hive!


