As you’re reading this, I will definitely be relaxing and enjoying a little holiday week after moving back to Australia from Japan, so if I’m a little slow to respond to comments, that’d be why! In the meantime, don’t forget to take advantage of the 15% off storewide “Sayonara Sale” – a great time to grab your own set of HST printables!
Welcome to the second quarter of the Modern HST Sampler! There’s still a little time today left to link up your blocks from quarter 1, so hurry over. This year, we’re making 24 modern half-square triangle quilt blocks, and by the end of the year, you will not only have a beautiful sampler quilt, but you will have some well-honed HST making skills. If you need more information, you can find out more about:
- The QAL and fabric requirements
- Required and recommended tools
- Tips for HST accuracy
- Frequently Asked Questions
- The rest of the blocks!
This quilt along has been structured so that you slowly ease your way into half-square triangles. We started off with 4″ finished HSTs (4.5″ unfinished), and now we’re tackling 3″ finished HSTs (3.5″ unfinished) for this quarter. We’re still using the same methods of making the half-square triangles – 2 at a time, 4 at a time, and 8 at a time – it’s just that this time the HSTs are a little smaller!
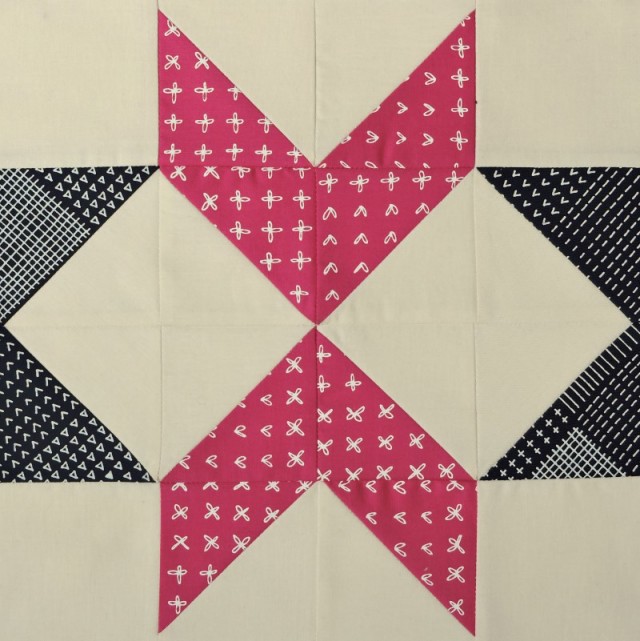
Fabrics used from the Modern HST Sampler Kit:
Blueberry Park Valentine Sprouting Row, Blueberry Park Navy Rough Patch, Kona Oyster
Pointed
Fabric Requirements
Fabric A (navy)
1 – 5 3/4″” x 5 3/4″” square
Fabric B (pink)
1 – 7 3/4″ x 7 3/4″ square
Background
4 – 3.5″ x 3.5″ squares
1 – 5 3/4″” x 5 3/4″” square
1 – 7 3/4″ x 7 3/4″ square
Block should measure 12.5” x 12.5”. Use a 1/4″ seam and press seams toward the darker print, or as directed.
Instructions
Step 1. Pair the 5 3/4″ Fabric A and background squares and make four HSTs. Open the HSTs and press the seam towards the background fabric. Trim to 3.5” square.
Step 2. Pair the 7 3/4″ Fabric B and background squares and make eight HSTs. Open the HSTs and press the seam towards the background fabric. Trim to 3.5” square.
Step 3. Arrange the HST units from step 1 and the remaining background pieces to create the block.
Step 4. Sew the units together to form rows, pressing seams in each row in alternate directions in order to nest seams and reduce bulk. Sew the rows together, pressing the seams open.
Step 5. Press the block, and trim to 12.5” square if necessary, keeping 1/4″ between the outer HST points and the edge of the block.

I can’t wait to see your first 3″ HST blocks! You can share them on Instagram using #modernHSTsampler (and feel free to tag me too – @blossomheartquilts!), or in the Blossom Heart Quilts group on Facebook, or even link them up to Sew Cute Tuesday. If you have any questions, please don’t hesitate to ask in the comments.
Click here for all the Modern HST Sampler quilt block tutorials


Norma V Northcutt says
oh, oh…how much smaller in quarter 3 and then what about quarter 4! yikes!
Alyce says
Haha! You shall see 😉 But you’ll be well-versed in doing these ones that are just that little bit smaller, so you’ll be fine either way!
Margaret (margiestitcher) says
thanks for this latest block, enjoy you new life in Auus
Susan says
That’s a great block! It’s the size I’ve been using the last year in my stars and pinwheels BOM. Thanks for another good pattern.
Krysta says
Is the 7 3/4 square supposed to be bigger? Mine came out small and I’ve checked my seam allowance. Your hst chart suggests a 8 3/4 square instead.
Alyce says
No, the 7 3/4″ is correct for 3″ finished HSTs – the size they are once they’re all sewn together. For this block, 3.5″ is the size you trim the HSTs to before sewing them together. You can always round up to the nearest half or whole inch increment! That will leave you more space for trimming, and thus more room for accuracy.