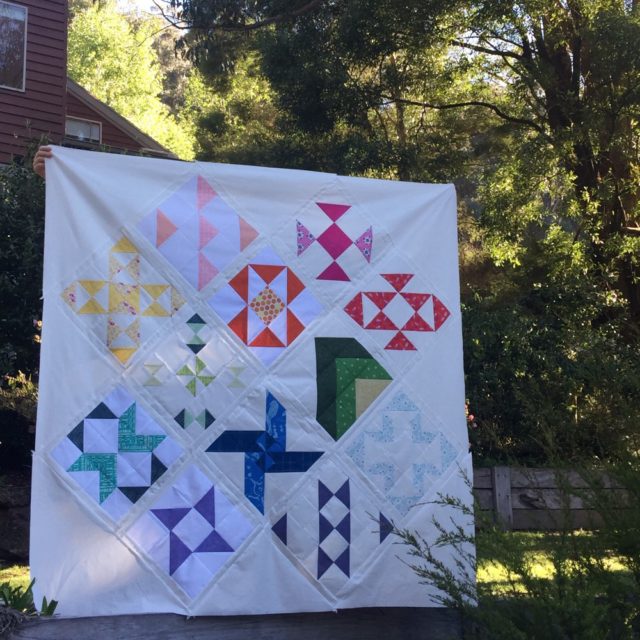
When you have a pile of sampler quilt blocks from a project that you don’t know what to do with, it can be hard to know where to start when it comes to finishing it off. You could easily add some sashing and call it done, but sometimes you want to make the quilt top a bit bigger but without making more blocks. Or perhaps you want to make something a bit more visually interesting. That’s where setting quilt blocks on point can help!
There are a few different ways to do this. You can set a quilt top on point using sashing too.
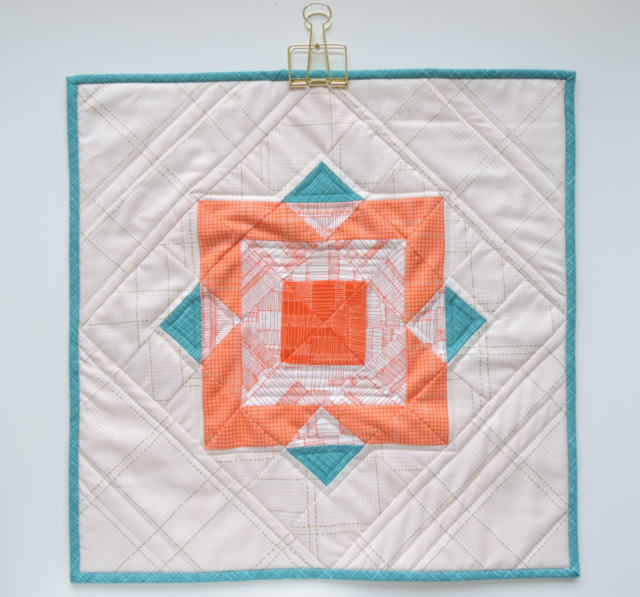
You can set the quilt blocks on point by doing it block by block. This method is good if you want to alternate on point blocks with square blocks like in this post!
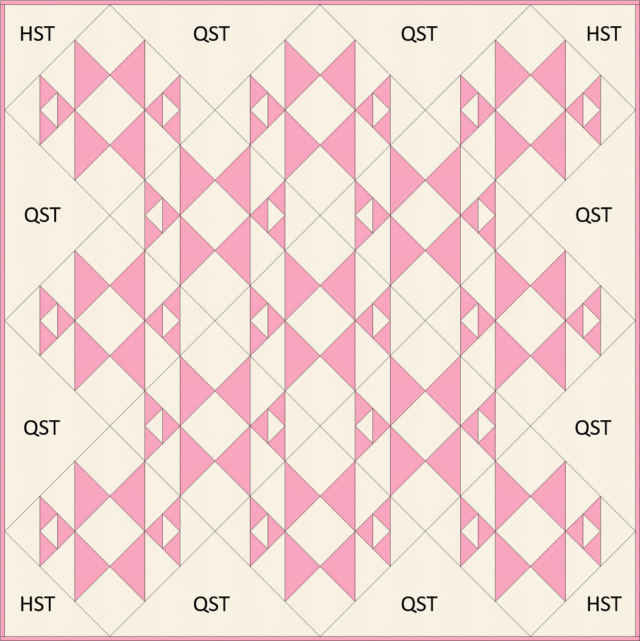
Or there’s something like the 1930s Farmer’s Wife Sampler Quilt, where the blocks are set on point in one long column.

There’s one thing that each method has in common – it uses triangles to make it all happen! And while the way in which you use these triangles and where you put them may differ, the maths is still the same.
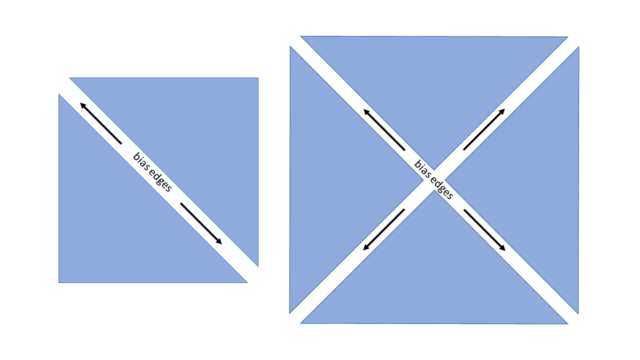
To work out which kinds of triangles you need to cut, you need to work out what edge/s of the triangle are going to be on the outside of your block or row. This is so that you sew the bias edge of the triangle to the quilt block, as that is the safest place to put it. When you’re dealing with triangles, you can either have one or two bias edges. And this is decided by how you cut the triangles – a half square triangle or a quarter square triangle.
Here’s an example of where you’d put these triangles so that all those outside edges of the triangles around the outside of the quilt aren’t on the bias. Otherwise, hellooo wavy stretchy quilt top!
Now comes the fun part, the quilt math to make it all work!
Corner Triangles
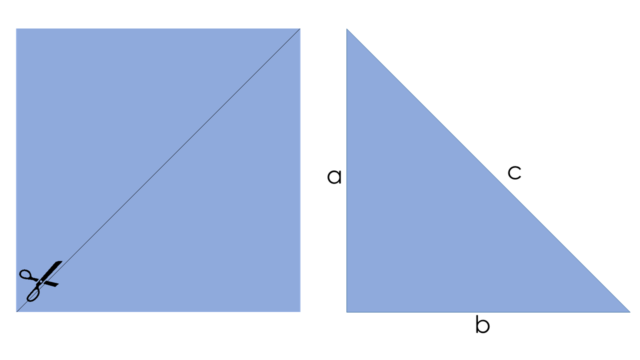
These babies are half-square triangles, where the cut edge is the same length as your quilt block. I’ll let you Google what the Pythagorean theorem entails, but here’s what it looks like.
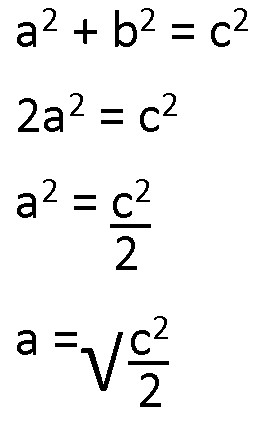
So, we have a2 + b2 = c2, where c is the unfinished size of our quilt block, and a and b are the two sides of the square we want to cut. As a and b are the same length, we can say that 2a2 = c2. Using algebra, we end up with:
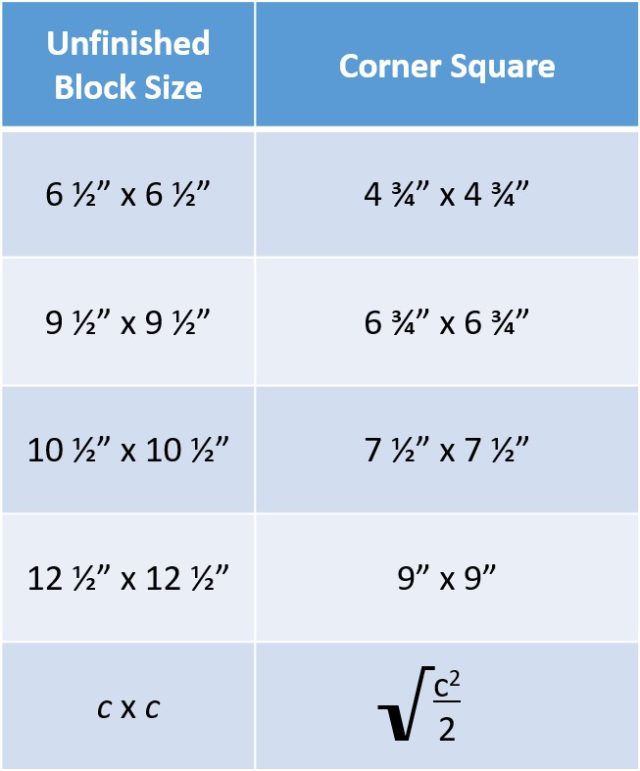
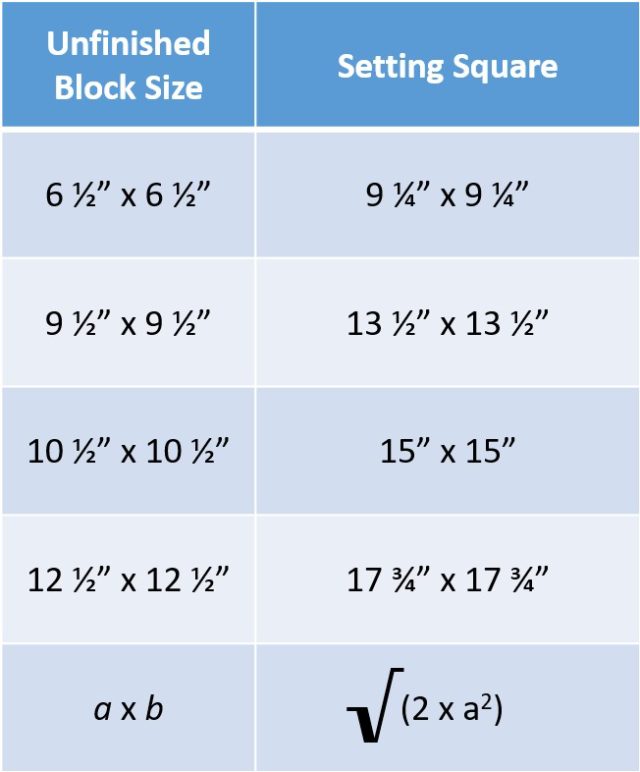
Now, I’m going to be kind to you and give a little cheat sheet on some of the most common quilt block sizes and what you size you need to cut the squares for making the corner half-square triangles.
This method gives you two corner triangles, which means that you will need to cut two corner squares to complete your (presumably!) four-cornered quilt top.
Setting Triangles
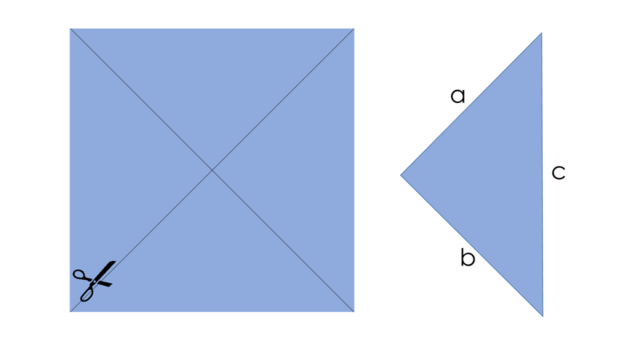
These triangles are mainly used to fill in the spaces between quilt blocks around the edge of an on point quilt top. But they’re also used when you’re setting your blocks on point like in the Farmer’s Wife quilt top mentioned before. The quilt math for these ones are much simpler, as this time, a and b are the unfinished sizes of our blocks and c is the size of the square we want to cut, which makes the maths a little more straightforward!
As a and b are the same length, we can say that 2a2 = c2. Once you’ve found out that answer, simply square root your answer and you’ll have the size of square to cut. And yes, once again I will give you the cheat sheet…
This method gives you four triangles to use between blocks, so you’ll need to count how many you need altogether and divide that number by 4 so that you know how many setting squares to cut.
So, clear as mud? Awesome! If you want to learn more about basic quilt maths, especially so that you can work it out yourself, you should check out my quilt math e-book, DIY Block Design!
Gale says
Very clear instructions. A patient reader could easily accomplish this math.
Alyce says
Thank you! That’s the aim!
Clairequilty says
Thank you for making the math easy.
Alyce says
My pleasure! Love this stuff 🙂
Candi says
Thanks Alyce – this is really good information. I have learned so much from you! I hope you have a wonderful Christmas and best wishes for the coming new year!
Alyce says
My pleasure! Merry Christmas to you too 🙂
LisaS says
I love your blog and newsletter. Both are so informative!
Alyce says
Thank you so much, Lisa!
Tracey Kirouac says
Alyce I’ve very much enjoyed your modern HST quilt along this past year. The accuracy of my blocks and points have come a long way! And I know I’ll be using the multiple HST sewing methods for years to come.
I completed two sets of blocks for the series. One using your beautiful fabric picks as sold through The Fatquartshop, and a second set using my own fabrics to make a slightly larger quilt. Both are assembled, layered, pinned, and ready to quilt. Just awaiting inspiration before I commit.
Thank you so much for taking us on this journey!
Alyce says
Thank you so much for joining in, Tracey! I have loved loved LOVED seeing the progress that everyone has made with their confidence and points!
Tina Borserine says
Your blog is most helpful. I’ve made several quilt s & it’s been a while since I put one in point. Can’t wait to get to it. Happy wuilting
Susan says
Hi Alice, thank you for the Math education. I love on point quilts. Math for me equates to Mental Abuse To Humans…lol. But, the way you have explained it in your quilt, I may just have to take a little of that back and start liking Math a little more, by the way, I work with engineers :).
Alyce says
Haha, glad I can help!