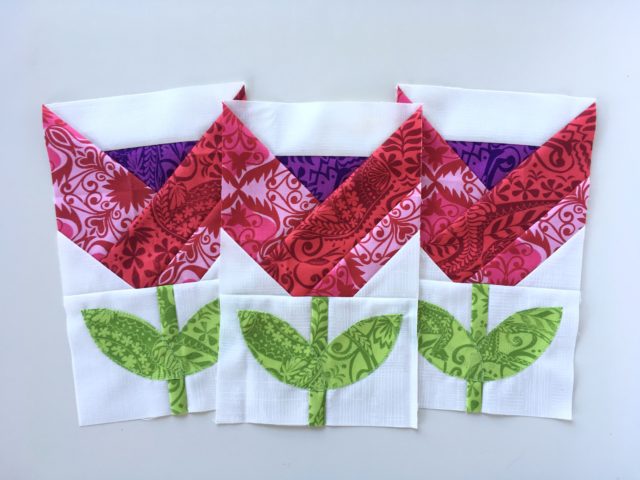
In my pursuit of handmade this year, I jumped at the chance to sew some blocks from the Dutch Tulips pattern by Fat Quarter Shop. It’s such a fantastic block that whips up in no time, and not only looks great, but allows for some super fun colour play too.
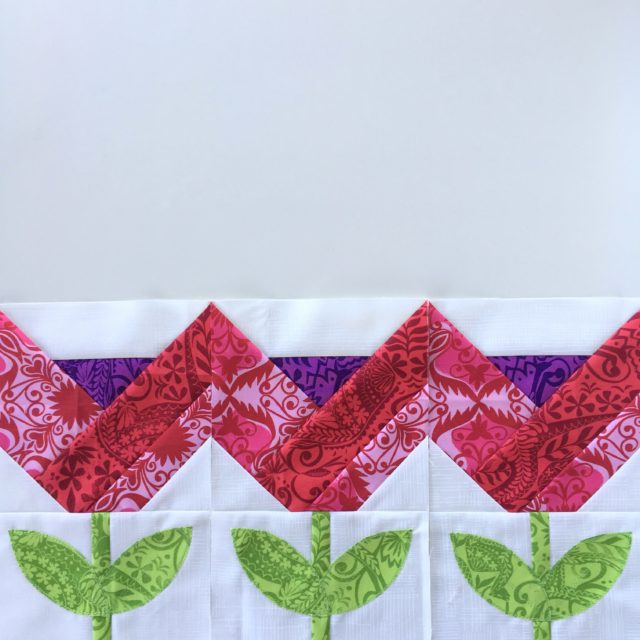
I made three blocks, as I will turn them into a table runner ready to gift as needed. I used four prints from Jasmine by Valori Wells – a pink, a red, a purple, and a green – and the background is from Carkai by Carolyn Friedlander. White-on-white for neutrality but still with texture! I like the depth that the red lends to the pink, in fact it almost just looks like a the pink is a lighter version of the red. Also, CAMEL BUTT 😉
Tips
A huge time-saving trick I learnt relatively recently is to use a hera marker to “draw” the lines on the back of your fabric when needing to mark it to sew along or next to, i.e. for half-square triangles or flying geese. If you stack 4-6 squares at a time, the hera marker will actually indent all the layers at one time!
I also saved all the offcuts and sew them together in an improv fashion to make some matching coasters, or maybe a potholder. We’ll see what happens!
Raw Edge Applique Tutorial
The pattern doesn’t include explicit applique tutorials, so that’s what I’m going to share for you today! I like raw edge applique for projects like this – it’s quick and adds some nice texture too!
You’ll need:
– light weight double sided interfacing
– the shape template from the pattern
– a pen or pencil
– fabric scissors
– iron
– thread that matches the fabric
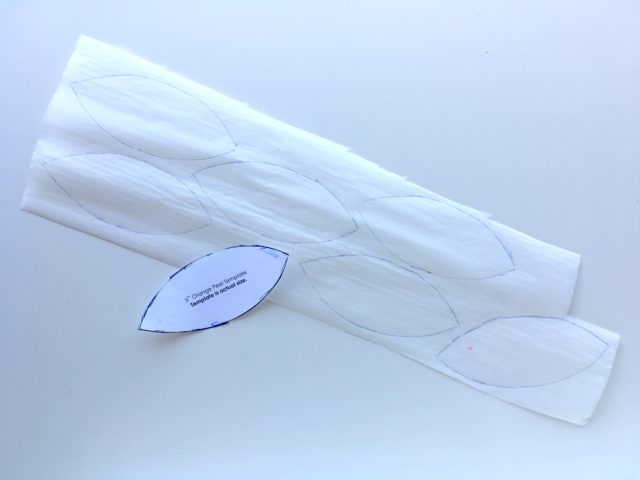
1. Trace the shape onto the paper side of the interfacing as many times as required. Now that you know how much interfacing you’ll be using, cut it out off the rest of your interfacing about 1/4″ from the edges of the shapes. Mine already had a bit cut out of one end from another project, so that’s why mine has that extra little bit there!
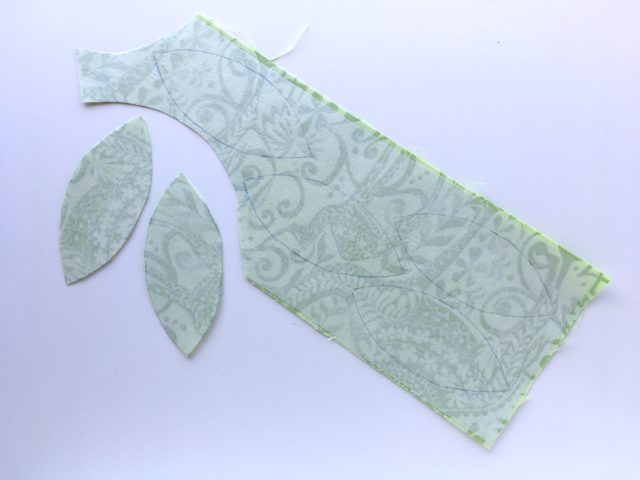
2. Place the non-paper side on the wrong side of your fabric. Following your interfacing’s instructions, fuse the interfacing to the fabric. Cut out your shapes along the drawn lines.
3. Peel off the paper and place them on the fabric according to the pattern instructions. I recommend doing it on your ironing board so that once it’s in the correct place, you can carefully fuse it in place. For this pattern, do it one leaf at a time! Make sure you put your iron directly on top of the applique and don’t move it sideways as you place it down.
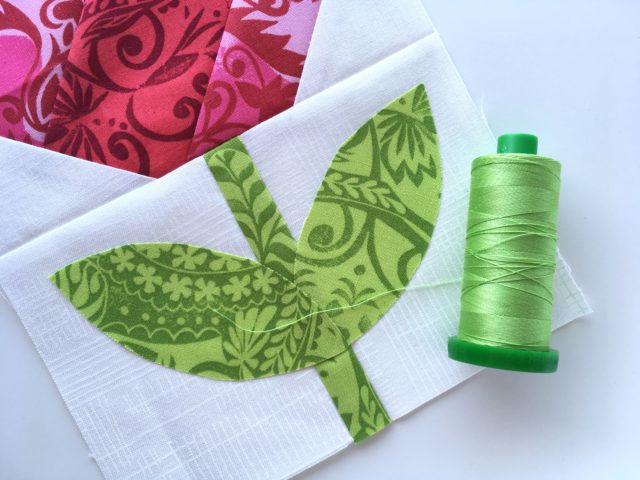
4. Choose a thread that matches your fabric as closely as possible. I used Aurifil 5017 (in 40w because that’s all I had!).
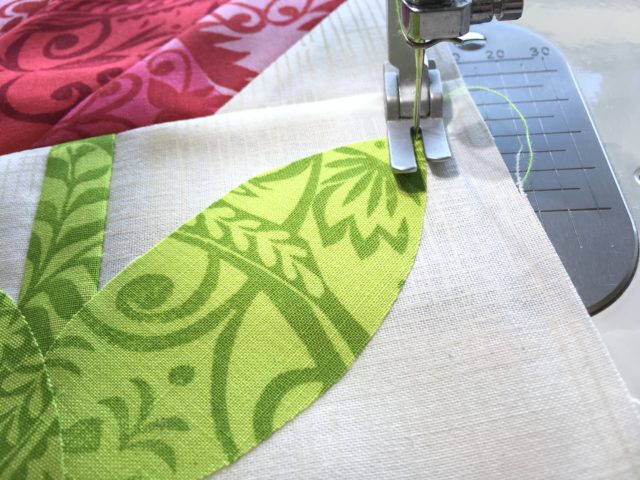
5. Carefully stitch as closely to the edge of the shapes as you can, going around 3 times. With this pattern, you will also need to go around the parts that overlap.
This is totally optional, but I added some lines in the middle of the leaf to make it look a little more “realistic”. You could add this when quilting, but this saves me having to change threads 😉
And there you have it! A raw edge appliqued quilt block. Not at all hard or scary!
Head on over to Jolly Jabber to see what the other bloggers have come up with! You can also check out their video tutorial for the pattern which includes how they did their applique.



Patricia says
The three rolls of stitching for thr raw edge , I like!
Alyce says
Easy and looks so nice!
Christine Christoffersen says
What size stitch length did you use?
Look really good!
Alyce says
Oh, great question! I just used my normal 2.5ish stitch length.