When you’re planning a sampler quilt design, sometimes you realise that you don’t want to just do a 3×4 grid, add some sashing, and call it a day. For my 8″ Qube version of Patisserie, I originally planned on a standard 3×4 grid with sashing, cornerstones, and a border.
This is what I did for the 6″ Qube version, so I wasn’t all that enthused about doing the same for this quilt as well. I wanted to do something different! I have made quite a few different sampler quilts over the years, so I did have a few different options for setting sampler quilt blocks, but I still just wanted to try something new, so I turned to alternate grid.
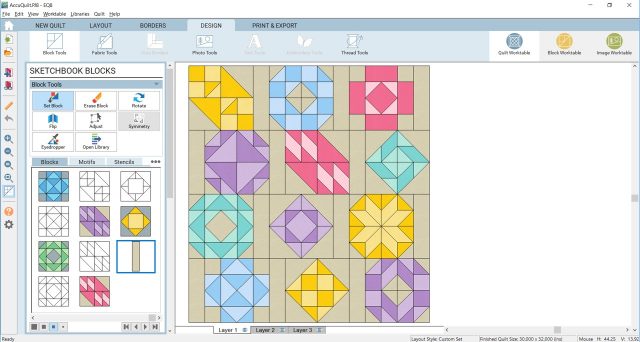
I had already drawn these blocks up in EQ8, and sewn them, so I wanted to have a play with the layout of the blocks to get the spread of colours right. Except, the basic horizontal quilt layout option would not suit to mix up the sashing options. You can have it just vertically, or just horizontally, or both with varying widths of strips, but not alternating like I was wanting. So I used the Custom Set layout option instead.
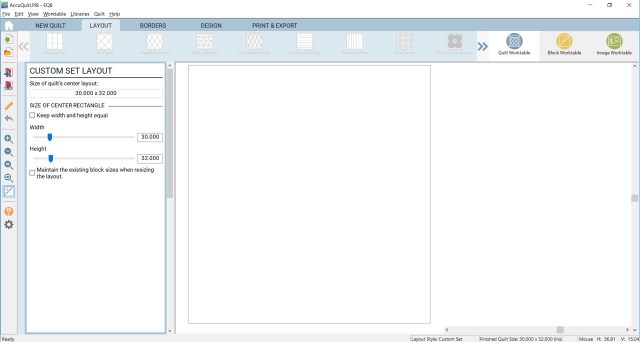
The Custom Set layout in EQ8 is perfect when you have a mix of quilt block sizes to put into a quilt top, like the Aurora sampler, or for something like this where it’s not a completely standard quilt top layout. When you open a New Quilt, scroll across the layout options along the top to Custom Set. Then under the Layout tab, you set the quilt top to the size you want the finished quilt. I already knew what the dimensions for my quilt would be, but if you’re not sure yet, check the box underneath to maintain the existing block sizes so that if and when you resize the quilt, the blocks remain the same size. I also deleted the border.
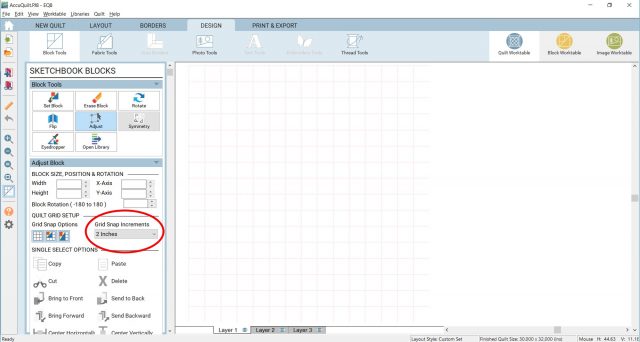
Next, head to the Design tab, and immediately click on the Adjust option. Here is where you set the Grid Snap options to help you place your blocks. I recommend setting the Grid Snap Increments to 2″ if your finished block size is an even number (and assuming that any sashing is also an even number). This will set the grid lines to mark every 2″, as well as snap your block to those lines.
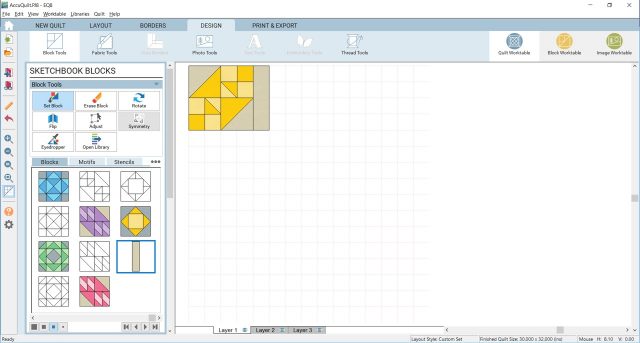
Now it’s time to Set Block and place your quilt blocks. To place the blocks, it’s simply a case of selecting the block you want to place, and dragging it onto the worktable to where you want it to go. Your cursor will be in the top left corner of the block, and that is where it will place the top left corner of the block. It’s also good to note that whatever the block size is set at from the Block Worktable is what it will be in the Quilt Worktable. If you wish to resize the quilt blocks, you can do that by clicking on the block to resize, click Adjust, and change the width and height.
To create the sashing strips in between, I simply made a quilt block at 2″ x 8″ and coloured with the background fabric colour I’m using, then placed it as a quilt block.
Keep on going, fill your quilt top, and it’s really that easy! Just like in other quilt layout options, you can Erase Block to remove blocks, or Rotate to rotate the blocks around. Use Fabric Tools along the top bar to recolour your blocks, etc.
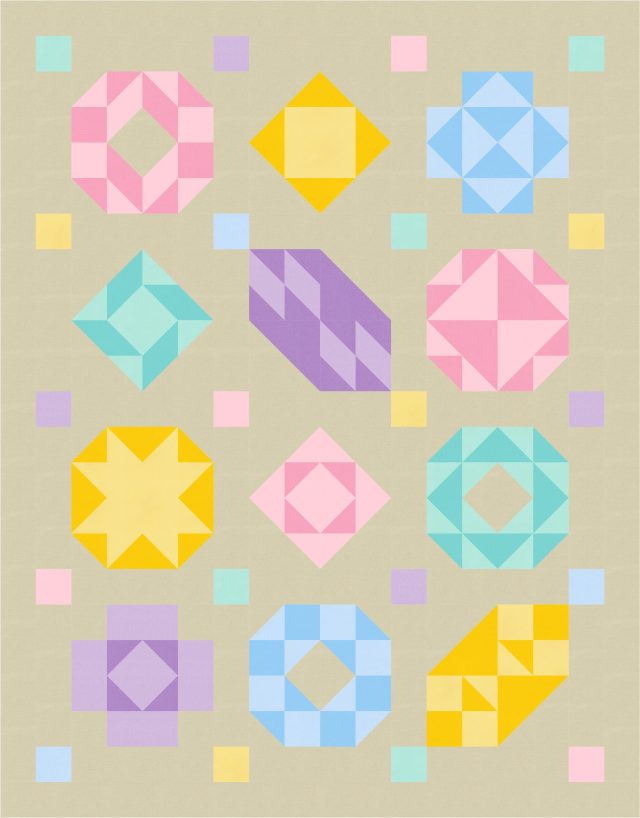
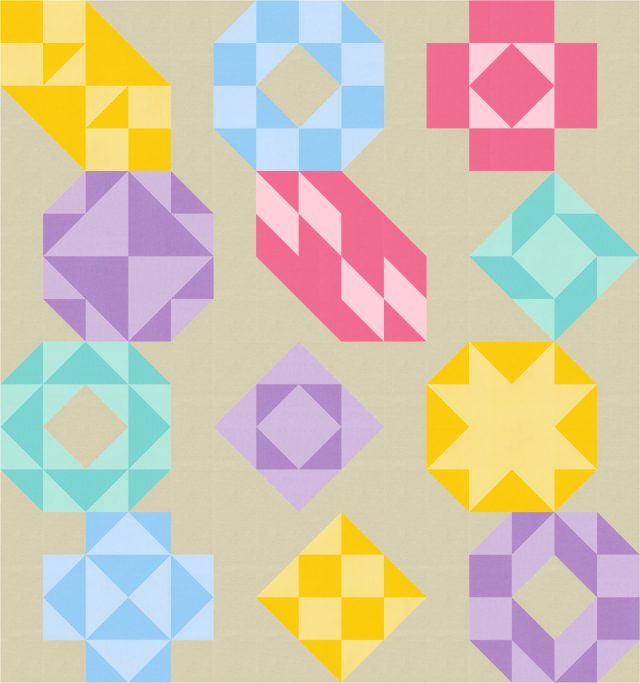
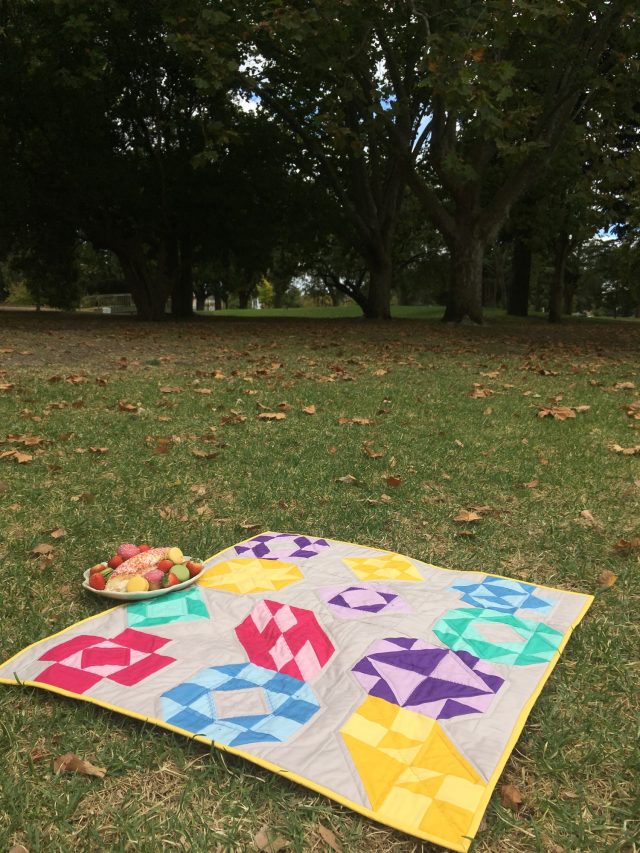
Here’s what the final design looked like, and then the finished quilt…
There just a few days left to grab anything in store at Electric Quilt for 20% off – including EQ8! If you’ve been umm-ing and ah-ing about it, now’s the time to pounce. Use the code EQ8ALYCE at checkout to get your discount. If you ever have any questions, let me know, and I’ll do my best to help!

Moira says
Thanks!
This is just the information I need to get moving on a layout for all the blocks from last year’s Honey Pot Bee.
Alyce says
Yes! This is perfect for the Honey Pot blocks!!
Julie @ The Crafty Quilter says
Thank you for that tutorial. I’ve been struggling with getting the right layout for a quilt and this is the ticket!
Alyce says
Oh wonderful! My pleasure! Good luck 🙂