Welcome back to part two of how to design a quilt pattern! In part one, I shared about how the Origami design came to be, and working out the fabric to use, so that means that it’s time to run the numbers. That is, work out the quilt maths* so that it’s a good quality pattern that is fun to work with!
*here in Australia, we say “maths”; in the US, “math” is used. I am so accustomed to using either interchangeably, so this post includes both wherever/however it comes out. Welcome to life as in “international” designer (AKA not in the USA!).
The Quilt Maths
When it comes to writing the actual pattern, the process varies from pattern to pattern. I always start with working out the rough math for overall fabric requirements so that I can order the fabric to get the quilt sample ball rolling. Then it’s on to the nitty-gritty block and quilt cutting details.
For Double Dash, I spent a good couple of days stuck to the computer with my phone calculator at hand to make sure that the maths worked for including so many fabric options – scraps/layer cakes, fat eighths/quarters, and yardage… for FOUR quilt sizes! But I digress. The maths for Origami is much simpler, and it’s been more a case of working out how to best use fabric to get a range of “papers” across the quilt top but without too much leftover fabric.
Knowing that Origami is the kind of quilt pattern that people will use to show off their favourite prints or range of fabric, I first made the decision to stick to working with common precuts – layer cakes (because the maths for each block works beautifully with this size) and fat quarters (as a common size of fabric to buy for a range you adore).
Here’s a snapshot of how the maths part of the design process is woven into the whole pattern-making process…
Day 1: Spend 2 hours creating the file in my design software (PagePlus X9 – now a legacy program, Affinity Publisher is the new version) from my pattern template and getting it all set up for Origami, which includes an assortment of tasks like:
- Edit quilt sizes on back cover
- Create the fabric cutting table, which includes finished quilt size, number of blocks, etc
- Write the “About The Pattern” and the blurb on the back cover
- Create basic block images in EQ8 and import into the pattern for reference illustrations
On that day, I also pulled out the fabric I had for my mother-in-law’s quilt, and planned what I needed to cut from each print. As this quilt is queen-sized, I started working out and documenting how much needed to be cut for a queen-sized Origami quilt. Her quilt is going to be a little off-piste, or “making the pattern my own” as I say, but having the basic requirements worked out and documented means I have a place to start for then working out what I need to do for mum’s quilt.
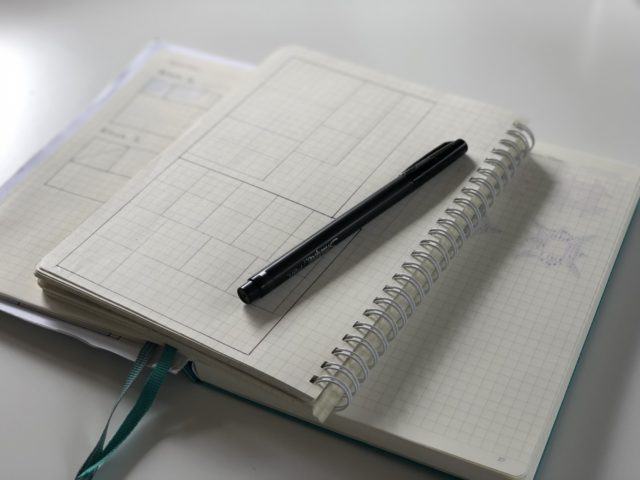
Day 2: Spend another couple of hours working out the best way to get the cuts of fabric needed from a fat quarter. I will always sketch it out on paper, whether to scale on grid paper or roughly on plain, scrap paper. Fat quarters should measure 18″ x 21″, but they can vary depending on the accuracy of the cutter. So I always make sure that the fabric cuts fit well within this, and if it would be really cutting it close but is worth squeezing it in to make the most of fabric, then I make a note in the pattern, i.e. “fat quarters must measure at least 18″ wide”.
Day 3: I print off the fabric cutting table and start cutting mum’s fabric. All goes well, my quilt math has worked, and I begin to sew. My focus for the moment is to get as much done on this quilt as I can before my pattern sample fabric arrives, because once it does arrive, my sole aim is to get the top made and to the quilter as quick as I can, and then my focus is on computer work and pattern writing, so I want to get some Origami blocks happening while I can! It’s always so motivating to see your design come together.
Day 4: While beginning to piece the rows together and sew up some paper crane blocks today, my pattern sample fabric arrives! I drop the paper crane block I was working on, and immediately switch gears into pattern sample mode. Which shall be the next blog post – all about the pattern sample! But on that day, I got everything cut and ready to sew.
Day 5: I take myself out for coffee with my laptop to my local Starbucks and spend a couple of hours finalising fabric requirements and writing the pattern instructions. This also includes beginning to make the diagrams, because once the text is all written, it’s then time to focus on layout and making the text and diagrams fit together well.
I offer my quilt patterns as PDF and as paper copies, which requires two different layouts. I first do everything for the PDF version, as that is what gets sent to my tech editor and to my pattern testers. Once the tech editor has sent her feedback, then I start to layout the paper copy which is finalised once my pattern testers have returned their feedback.
Day 6: I finish up all the diagrams and check that I’ve added in all the numbers where they need to go. At this point, it’s pretty much all ready to go to my tech editor once I’ve given it another go over. The tech editor always picks up something, so I’m not aiming for perfection, but it’s important to make sure that I’ve filled in the boxes, dotted the i’s and crossed as many t’s as I can see 😉
A note on tech editing – I cannot recommend strongly enough that you have someone professionally edit the pattern for mathematical accuracy and the text for ease of use and readability. There’s nothing worse for a customer than to buy a quilt pattern and the numbers to be full of errors and the text is confusing and not easy to follow. I use and highly recommend Michelle from Sew Sorted.
The next step from here is to make the pattern sample (part 3), and then send it to the tech editor followed by pattern testers.
If you’d love to use EQ8 to design your quilts, use the code EQ8ALYCE to get 20% off your order at Electric Quilt until December 31st, 2019. That includes the EQ8 software – bargain! And then check out my free EQ8 project file downloads to get you started in designing quilts.
Next in the process is making the quilt pattern sample – the cover girl!


susie says
Wow – it’s so complicated but then you do love your ‘math’ don’t you? I’m so glad someone else does this work for me. hehe. Thanks for sharing. Amazing work.
Alyce says
LOL! I was trying to make my process sound neat and orderly, but yeah, it’s bits here, bits there, back and forth and around and around.
Kathleen says
A big process. So a Tech Editor is a professional proof reader?
Alyce says
Yes! Editor in the language sense, and in the technical maths/numbers sense.
Kathleen says
Cool, thanks!
Joan says
“Fat quarters should measure 18″ x 21″, but they can vary” They are often not straight and if I want to fussy cut a geometric or scene I dive in the deep end and buy the 1/2 yard. My old quilt shop did NOT sell Fat Quarters, only Halves. She’s gone and I miss being able to grab and go with 1/2 yards. When I stand in line I only get tempted to buy more of what the person in front of me is buying.
Love the math. I always carry grid paper in the car in case a design jumps out at me.
LOVE LOVE LOVE THE NEW design, looks like note paper? or Christmas letters or scrapbooks and of course step of origami!
Thanks for sharing all your ideas with us.
Alyce says
Oh yes, wonky cutting, whether precuts or by a store, drive me crazy too! And thank you! It was (clearly) inspired by origami papers, but yes, all those gorgeous scrapbooking papers too for sure.
Robyn says
Hi Alyce,
Such a lot of work and thought and precious hours you spend writing up patterns!! I had no idea Of the process but am now a wiser and even more appreciative sewist.
So good for your pattern to be checked by Michelle @ sewsorted I have been caught out with errors before. So frustrating.
Great read . Thanks 😍
Alyce says
Thanks, Robyn! I know that I love seeing “behind the scenes”, so I do like to share some of that when I can here too.
Renata Auld says
Great post Alyce, I have been trying to get a pattern together, I’ll look at the software you use, I thought EQ8 would do it all but I’ve had no success with exporting the files to pdf, so this is such great info thank you 👌🙂
Alyce says
My pleasure!
Ally says
Hi great read. I was looking for Part 3 and 4 (you mentioned them in this post but they are not linked). Did you end up writing those too? I had a little nosey around but couldn’t find them. Thanks
Ally says
Ok I found them! Hooray! You might want to update part 2 to include links to the other posts if that is your jam.