This month for the Mini Masterpieces QAL, we’re up to sewing the Complex Curves chapter, and I’m sharing some tips throughout this month to help booster your confidence in sewing curves. Fun fact – I was too nervous of sewing curves for a few years, until I finally saw a friend sewing them in person and I realised it wasn’t so scary. For me, I had to see it to understand how it worked. So if that’s you too, then stick around to check out a video tutorial next week! But today, it’s first things first – how to accurately cut the curves in the first place.
We all know the importance of careful cutting to help us sew more accurately, but when it comes to curves, it gets a little trickier, hey? But by accurately cutting curves, you’ll be already be ahead of the game when it comes to curved piecing.
Press the fabric well.
Before you begin cutting fabric for your projects, it’s always important to press the fabric to remove wrinkles and fold lines so that you can cut accurately. Otherwise, these wrinkles and fold lines can cause wonky edges on your cut pieces, which can impact on how accurately you sew them together.
As always, it’s important to press the fabric by lifting the iron up and down, and not iron it back and forth, pulling on the fabric. This especially the case when cutting curves, as you’ll be cutting across the grain of the fabric, and the exposed bias edges are easily stretched and distorted if you pull on the fabric with your iron. I also like to use a starch-alternative, Flatter, to help get the fabric even more smooth and, well, flat! So pull out your starch or spray to remove the stubborn wrinkles.
Downsize your rotary cutter.
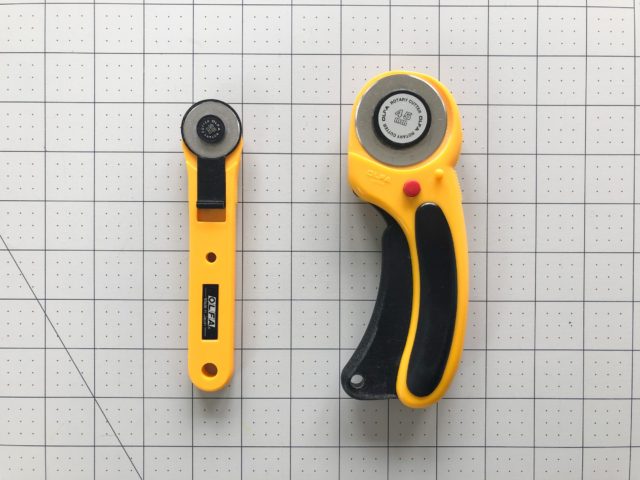
The standard quilting rotary cutter is a 45mm size blade. This size is great for easily cutting squares and rectangles and other straight-edged shapes, but not so great for cutting around curves. Especially if you’re using acrylic templates or template plastic. Using a 28mm size rotary cutter means that you can better manoeuvre around the curves, resulting in better accuracy, as the smaller blade has a smaller turning circle. You can downsize even further, but a 28mm rotary cutter will make a noticeable difference (and is more readily available too).
If in doubt, use scissors.
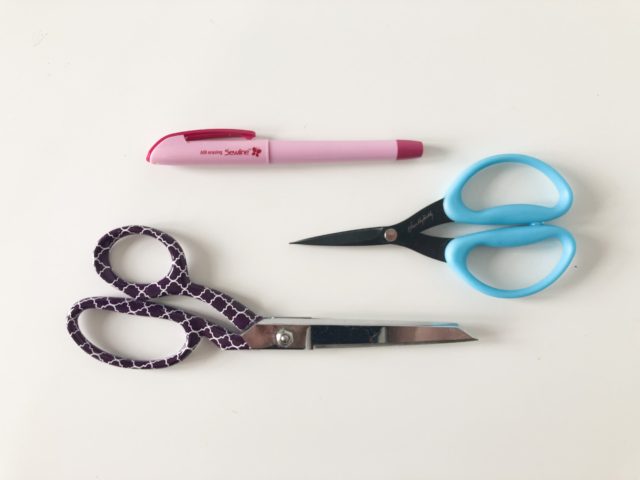
I get it, using a rotary cutter around curves can be daunting, as it’s much easier to slip and slide! Using a fabric-safe erasable marker to trace the templates onto your fabric and then cutting with sharp fabric scissors is a perfectly valid option. I prefer a smaller, sharp blade to cut curves – these Karen Kay Buckley scissors are awesome as they’re incredibly sharp and maneuverable! But I know some quilters prefer to use longer blades, so have a try and see how you go with what you have on hand.
Heads up – these scissor-cutting skills will also come in handy when making applique quilts like we will be in January for the Mini Masterpieces quilt along!
Also, don’t forget that you can always practice on scraps! Just to get that muscle motion happening and to get a feel for what works best for you and your way of working. If you have any tips to share with us, leave them in the comments. Maybe you have something that will click for someone else!
This post contains affiliate links. Thanks for your support!


Joan says
Love the scissors tip. Thanks. Sometimes you just need to go to the beginning. And starch. I like starch so thick is stands alone. I wash all my quilts before gifting them so it all washes out. Lots on the market or make your own with powdered starch.
Enjoy the spring! Thanks!
Alyce says
Haha! That’s an impressive amount of starch 😉
Tami says
I would like to know how to hand stitch around curves for appliqué. My first attempt failed miserably. Ended up taking it all apart and took the quilt in a different direction with out appliqué.