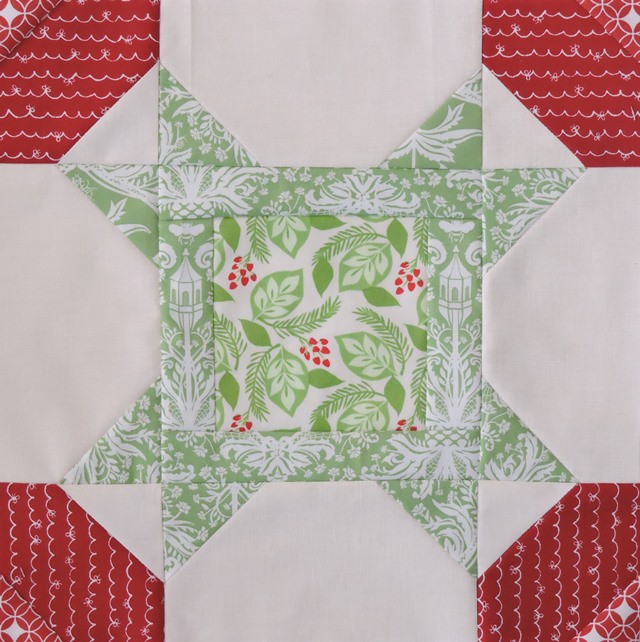
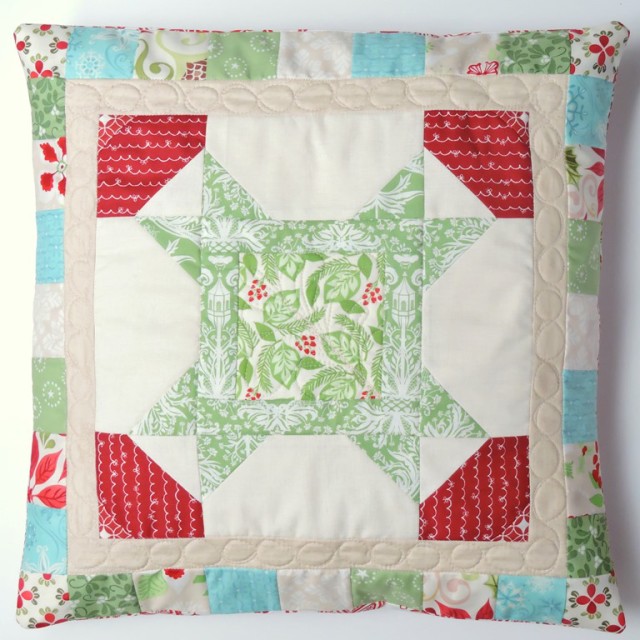
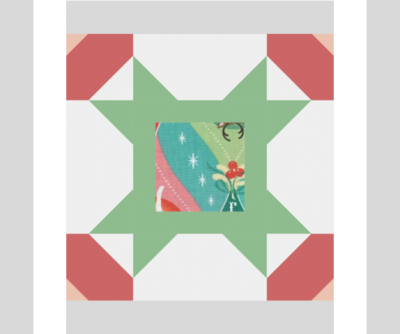
Funny background story: I mentioned a few weeks ago that I wanted my Quatrefoil block to be the very centre of my sampler quilt for The Bee Hive, and to do so, I needed 25 blocks instead of 24. There was some excited feedback from people at the idea of another bonus block, and so I designed and made this block, Christmas Star, as the 25th block… until I realised there is already a bonus block – Autumn Chain! So, consider this an extra bonus Bee Hive block if you like, but I turned mine into a pillow instead. So this is kind of a 2-for-1 tutorial post, where I’ll show you how to make the quilt block, and then how to turn it into a pillow too!
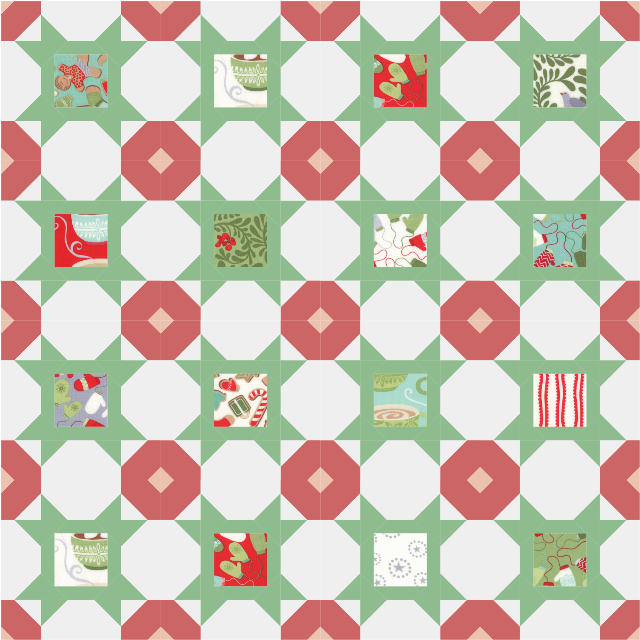
Christmas Star is designed to work perfectly with charm pack squares, with the centre square finishing at 4″. I chose to go fairly low-key in terms of how many Kate Spain Christmas charm packs I have lying around, but you could certainly go Christmas Crazy with choosing feature prints to use instead! As for the corner units? Well, when in repeat, you get a lovely little bunch of Christmas ornaments! FYI, if you use a layer cake, you would be able to make each ornament from the same print with careful layout planning to match them all up.
Aw, it’s a Christmas wonderland! And you could easily reduce the block by 50% using quilt maths to make it into a mini, or to be able to use the same charm square for each ornament!
Quilt Block Tutorial
What you’ll need
1 – 4.5″ x 4.5″ feature print
Star:
2 – 1.5″ x 4.5″
2 – 1.5″ x 6.5″
8 – 2.5″ x 2.5″
Ornament:
4 – 1.5″ x 1.5″
4 – 3.5″ x 3.5″
Background:
4 – 2.5″ x 2.5″
4 – 3.5″ x 6.5″
Block finishes at 12″ x 12″. Use a 1/4″ seam and press seams as directed.
Step 1. Sew the short Star strips to either side of the feature print, press toward the feature print. Sew the longer Star strips to remaining sides of the feature print, press toward the feature print.
Step 2. Draw a line diagonally across the back of all the 2.5″ Star and background squares, and the 1.5″ Ornament squares.
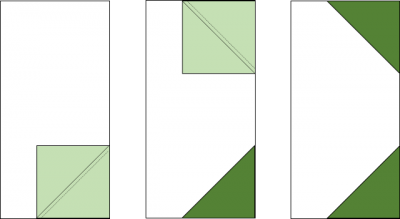
Place one 2.5″ Star square in the corner of a background rectangle, aligned as per the diagram. Sew along the line and trim 1/4″ towards the outer corner from the seam line. Repeat for the other corner of the rectangle. Make 4.
Repeat the process with the 3.5″ Ornament squares and the background squares. Make 4. Repeat the process for the opposite corner with the 1.5″ Ornament squares. Make 4.
Step 3. Arrange your units into rows, following the block photo. Sew into rows, pressing seams in alternate directions. Sew the rows together and press seams open.
Continue to make more blocks to make a quilt, or use the next tutorial to turn your block into a festive pillow!
Christmas Star Pillow Tutorial
You can easily use this tutorial to add a patchwork border to any 12.5″ unfinished quilt block you have lying around!
What you’ll need
Pillow top:
32 – 2.5″ x 2.5″ prints
2 – 1.5″ x 12.5″ border
2 – 1.5″ x 14.5″ border
Batting: 19″ x 19″
Lining: 20″ x 20″
Backing: 2 – 13″ x 18.5″ print
18″ pillow insert
Pillow finishes at 18″ x 18″. Use a 1/4″ seam unless otherwise directed. Press seams as directed.
Step 1. Sew the shorter border strips to either side of the Christmas Star quilt block, press seams towards the background. Sew the longer border strips to the remaining sides of the block, press seams towards the border.
Step 2. Piece the 2.5″ print squares into rows. Make two rows with 9 squares each, and two rows with 7 squares each. Press seams open.
Step 3. Sew the shorter rows to either side of the bordered block from step 1, press seams open. Sew the longer rows to the remaining sides, press seams open.
Step 4. Layer the lining, batting and pillow top. Baste and quilt as desired. I first used my walking foot and stitched in the ditch around the centre square, the outside of the star strips, and the inner and outer seams of the block border. This stabilised the block, so I could then add some free motion quilting. I then added free motion circles in the block border and a leafy feather to the centre to echo the print to add some texture and decorative touches.
Step 5. Hem each backing rectangle, by folding one long edge 1/2″ over wrong-sides together, and folding it over again to enclose the raw edge. Press to hold in place, then sew along 1/8″ from the first fold edge. Sew again 1/8″ from the outer folded edge.
Step 6. Place the pillow top right side up. Place one backing piece right-side down, aligning the outer raw edges. Place the other backing piece right-side down on top, aligning the outer raw edges. There should be about 6″ of overlap of the backing pieces. Pin or Clover-clip to hold in place, and sew a generous 1/4″ seam around the outer edge, backstitching a couple of times at each of the hemmed edges of the backing pieces to secure them in place. Turn the pillow case out and press to remove wrinkles and flatten the seam.
Step 6. Insert the pillow form and give it a hug! Or in my case, mediate between the two kids fighting over who gets to have it for their bed… I have no idea who’ll win that battle.
Newsletter subscriber bonus
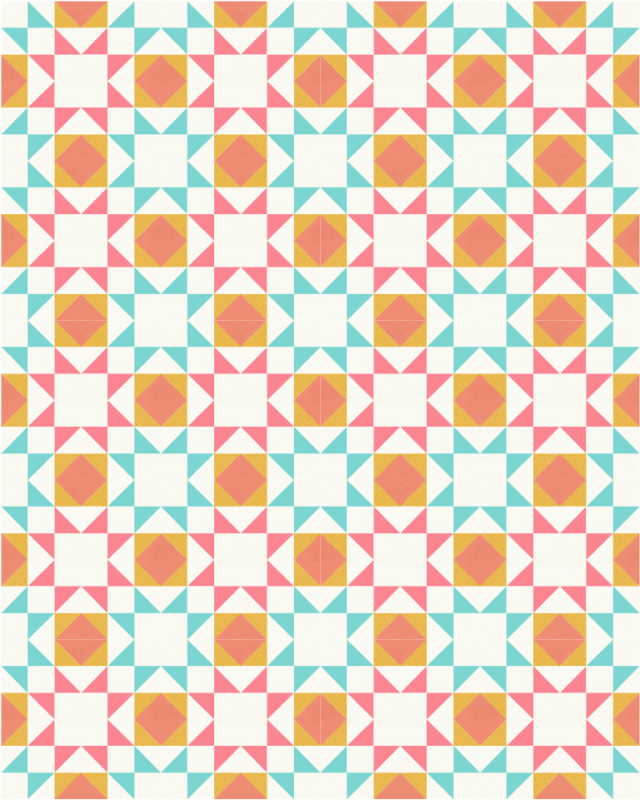
If you love star quilt blocks, and want even more options for blocks like this and others in The Bee Hive, be sure to subscribe to my newsletter, because there’s a free pattern for the block that makes this quilt, Diamonds In The Sky, going out on December 1st!



Jackie says
I love the pillow and fabrics! Thank you for the tutorial….
Linda Fleming says
Thank you for sharing. I love your pretty Christmas block and your great tutorial!
Anita L says
Love this one!